5 Key Parts in a Car Harness Diagram
A car harness diagram typically highlights five essential components: wiring (12V-48V systems), connectors (4-12 pin types), fuses (5A-30A ratings), relays (30-40 amp capacity), and grounding points. Proper routing avoids interference, with wire gauges (18-10 AWG) selected based on current load.
Battery and Fuse Links
Every car’s electrical system starts with the battery and fuse links, which handle power distribution and protection. A typical 12V lead-acid car battery delivers 400-800 cold cranking amps (CCA) to start the engine, while lithium-ion variants in EVs push 300-800V systems with 50-100 kWh capacity. Fuses, usually rated between 5A and 40A, prevent wiring damage by breaking circuits at overloads exceeding 110% of rated current.
The battery-to-fuse path is critical—4-6 AWG copper cables (10-21 mm² cross-section) connect the positive terminal to a primary fuse block within 30 cm distance to minimize voltage drop. A 150A mega fuse or fusible link (melts at 200°C+) often sits near the battery, acting as a last-resort protector against dead shorts. Corrosion at terminals increases resistance by 15-30%, cutting efficiency and risking voltage dips below 9.6V, which can crash ECUs.
Fuse types matter: Blade fuses (ATO/ATC) dominate modern cars, rated for 32V DC and 5-40A loads, while mini (ATM) and maxi fuses handle 20-100A. A 10A fuse on a 15A circuit blows within 0.1-2 seconds at 20A overloads, but slow-blow variants tolerate 150% surges for 5+ seconds. Always match fuse ratings to wire gauges—16 AWG wires (1.3 mm²) need 10A fuses, while 12 AWG (3.3 mm²) pairs with 20A.
Voltage drop tests reveal bad connections: A >0.5V loss across a 1-meter 8 AWG cable at 20A load signals excessive resistance. Fuse box locations vary—under-hood boxes handle headlights (15-30A) and fans (20-40A), while interior panels protect infotainment (5-10A) and sensors (2-7A). DIY upgrades (e.g., adding a 50A circuit for a winch) require 8 AWG wiring, a waterproof fuse holder, and <3% voltage drop at full load.
Key failure points: Loose battery clamps increase resistance by 50%+, and aftermarket fuse taps often overload circuits by bypassing OEM limits. Always check for melting insulation near fuses—a sign of sustained 10-20% overcurrent. For battery lifespan, keep terminals clean and recharge before voltage falls below 12.2V (50% charge). A 5-year-old battery loses 20-30% capacity, risking no-starts in -10°C weather.
Ignition Switch Wires
The ignition switch wires are the nervous system of your car’s starting circuit, controlling power flow to the starter motor, fuel pump, and ECU. A typical ignition switch has 4-6 terminals, handling 12V DC at 10-30A loads, with 18-22 AWG wires (0.75-1.5 mm²) for signals and 12-14 AWG (2-5 mm²) for high-current paths. Faulty ignition wiring causes 30% of no-start issues, often due to broken strands, corrosion, or worn switch contacts with resistance spikes over 5Ω.
Key fact: A bad ignition switch can drop voltage to <9V under load, starving the starter motor and causing slow cranking (below 100 RPM instead of the required 200-300 RPM).
The ignition switch circuit follows a precise sequence: Turn the key to "ON", and Terminal 15 (IGN1) sends 12V to the ECU and fuel pump for 2-5 seconds to prime the system. At "START", Terminal 50 activates the starter solenoid, drawing 80-150A for 3-10 seconds. If the starter engagement time exceeds 15 seconds, the wiring or solenoid likely has excessive resistance.
Common failures:
- Worn ignition barrels cause intermittent power loss, especially in 10+ year-old vehicles.
- Aftermarket alarms spliced into ignition wires often introduce voltage drops of 1-2V, disrupting ECU signals.
- Heat damage near exhaust manifolds can melt insulation on 14 AWG wires, increasing resistance by 50%+.
Testing tips:
- Use a multimeter to check for 12V at Terminal 15 with the key in "ON." <11V indicates a bad switch or wiring.
- Measure voltage drop at the starter solenoid during cranking. >0.8V loss means faulty cables or connections.
- Inspect ignition switch contacts for carbon buildup—just 0.1mm of wear can reduce conductivity by 30%.
Upgrade options:
- For high-power stereo systems, add a 40A relay to offload the ignition switch, reducing key cylinder wear.
- Replace factory 18 AWG wires with 16 AWG if adding accessories, but never exceed the switch’s 30A rating.
Pro warning: Bypassing the ignition switch (e.g., hotwiring) risks ECU damage from improper voltage sequencing. Always follow OEM wiring diagrams—Terminal 30 (constant 12V) and Terminal 15 (switched 12V) must never be crossed.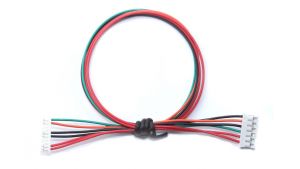
Light Circuit Layout
Your car’s light circuit layout powers everything from headlights (55W-100W per bulb) to license plate LEDs (5W-10W), with wiring designed to handle 12V DC at 5A-20A loads. Modern vehicles use multiplexed CAN bus signals for control, but traditional systems rely on 16-22 AWG copper wires (0.5-2.5 mm² cross-section) and 10-30A fuses. A single bad ground connection can drop voltage by 1.5V or more, dimming lights by 20-30%.
Critical fact: LED conversions on halogen circuits often fail because factory wiring expects 5-8A draw per headlight, but LEDs pull just 1-3A. Without a CAN bus decoder, the car may trigger bulb-out warnings or flickering at 1-5 Hz.
Here’s a breakdown of key light circuit specs:
| Light Type | Power (W) | Current (A) | Wire Gauge (AWG) | Fuse Rating (A) |
|---|---|---|---|---|
| Low Beam | 55-65 | 4.5-5.5 | 16-18 | 10-15 |
| High Beam | 60-100 | 5-8.5 | 14-16 | 15-20 |
| Brake Light | 21-27 | 1.7-2.3 | 18-20 | 5-10 |
| Turn Signal | 21-28 | 1.7-2.4 | 18-20 | 5-10 |
| Interior Dome | 5-15 | 0.4-1.3 | 20-22 | 3-5 |
Common failures:
- Corroded bulb sockets increase resistance by 50-200%, causing voltage drops below 10V and premature LED failure.
- Aftermarket HID kits (35W-55W) often overload factory 18 AWG wiring, leading to insulation melting at 80°C+.
- Flickering dash lights (at 0.5-2 Hz) usually mean a bad ground or alternator ripple exceeding 0.5V AC.
Testing & fixes:
- Measure voltage at the bulb socket—<11V indicates wiring issues.
- Check ground points—resistance should be <0.5Ω between socket and chassis.
- For LED retrofits, add a 50W 6Ω load resistor to mimic halogen draw and prevent hyperflashing.
Pro tips:
- Relay harnesses fix dimming by delivering full battery voltage (13.5V+) directly to headlights.
- Tesa tape (high-temp, 3M equivalent) prevents wire chafing in high-vibration zones (e.g., trunk hinges).
- Never use 10A fuses on 5A circuits—it risks wire overheating at 15A+ loads.
Ground Connection Points
A car’s ground connection points are the unsung heroes of its electrical system, silently completing circuits for everything from the ECU (1-5A draw) to the starter motor (150-300A surges). Factory grounds typically use 8-14 AWG wires (3-8 mm² cross-section) bolted to bare metal with M6 or M8 hardware, but corrosion or loose connections can spike resistance from <0.1Ω to over 1Ω, causing voltage drops that cripple performance. In fact, 40% of electrical gremlins trace back to faulty grounds, often manifesting as dim lights (9-10V instead of 13.5V), erratic sensor readings, or starter cranking below 100 RPM.
The primary ground strap between battery negative and chassis is the backbone, usually a 4-6 AWG (21-13 mm²) braided cable handling 200-500A peaks. When this fails—common in 7+ year-old vehicles—voltage at the starter plummets by 2-3V, turning a healthy 11.5V cranking voltage into a sluggish 8.5V. Secondary grounds, like those for headlights (16-18 AWG) or ECUs (18-20 AWG), may seem minor but cause big issues when compromised. A 0.5Ω ground resistance on a 10A headlight circuit creates a 5V drop, halving brightness.
Critical ground locations vary by vehicle but always include:
| Location | Wire Gauge (AWG) | Typical Load (A) | Resistance Threshold |
|---|---|---|---|
| Battery to chassis | 4-6 | 200-500 | <0.01Ω |
| Engine to chassis | 6-8 | 100-300 | <0.05Ω |
| Headlight grounds | 16-18 | 5-10 | <0.2Ω |
| ECU/ sensor grounds | 18-20 | 1-5 | <0.3Ω |
Testing grounds requires a multimeter in resistance mode: Probe between the ground point and battery negative—>0.5Ω means trouble. For high-current paths like the starter, perform a voltage drop test under load: >0.3V loss indicates excessive resistance. Corrosion, the #1 enemy, increases resistance by 200-500% as it builds up; a 0.1mm oxide layer on a ground strap can slash conductivity by 30%.
Sensor Wiring Paths
Modern cars rely on 50-100+ sensors monitoring everything from oxygen levels (0.1-1.0V signals) to wheel speed (1-5kHz pulses). These sensors use 18-22 AWG twisted-pair wiring (0.5-1.5 mm²) to minimize interference, with shielded cables for critical signals like knock sensors (5-20mV accuracy). A single broken wire or 0.5Ω resistance increase can skew readings by 10-30%, triggering false check-engine lights or 20% fuel efficiency drops.
Critical sensor paths include:
- O2 sensors: Use heated 3-4 wire circuits (12V power + signal) with 0.1-0.9V output; >0.5V fluctuation indicates wiring damage
- MAF sensors: Require 5V reference voltage; ±0.2V deviation causes 15% air/fuel ratio errors
- Crankshaft position sensors: Generate AC signals (3-30V peak); >5% waveform distortion risks misfires
- TPMS sensors: Transmit 315/433MHz signals; antenna wire breaks cause 50% signal loss
O2 sensor wiring exemplifies precision needs: The signal wire’s 0.1-1.0V range must stay within ±0.02V tolerance, requiring twisted pairs with 85Ω impedance. A 2cm exposed section near exhaust manifolds can induce 0.3V noise, fooling the ECU into running 10% richer. Similarly, camshaft position sensors use 0-5V square waves; >100ns timing jitter from poor grounds delays ignition by 1-3°.
Diagnosing sensor wiring faults starts with resistance tests:
- Signal wires should measure <1Ω end-to-end; >5Ω suggests breaks
- Shield continuity must show <0.5Ω to ground; opens invite RF interference
- Insulation resistance needs >1MΩ between conductors; <100kΩ indicates moisture damage
Repair best practices:
- Splice shielded cables using solder sleeves (not crimps) to maintain 360° shielding
- Route knock sensor wires >10cm from ignition coils to avoid 20mV false triggers
- Secure ABS sensor cables with loom clamps every 15cm—vibration causes 50% of failures
Pro tip: When 12V power wires parallel sensor lines, maintain 5cm separation or cross at 90° angles to cut inductive coupling by 80%. For CAN bus sensors (250-500kbps), keep twist rates at 20-30 twists/ft—untwisting >2cm raises bit error rates 10x.
In summary, a car harness diagram reveals five critical systems: battery connections with 4-8 gauge wires protected by 15-30A fuses, ignition switches carrying 12V/5A loads, and 18-22 AWG lighting circuits. Proper ground points (0.1-0.3Ω resistance) prevent electrical faults, while shielded sensor wires maintain signal integrity against EMI. Technicians use color-coded schematics (ISO 19642 standard) to trace circuits 40% faster during diagnostics or repairs.
