Wire Harness Design Process I How to Do It in 7 Steps
Start by defining electrical requirements (voltage, current, signals), then create a schematic. Select wires (gauge, insulation) and connectors (sealed for IP67 if needed). Use CAD tools (e.g., AutoCAD Electrical) for 3D routing, ensuring bend radius ≥4x diameter. Add labels (laser-printed for durability) and test continuity (0.5Ω max resistance). Validate with EMI/thermal testing.
Gather Wire Requirements
Before designing a wire harness, you need to collect all the necessary electrical and mechanical requirements. A well-documented set of specs prevents costly redesigns—studies show that fixing errors in later stages can increase costs by 300-500% compared to early corrections.
Start by listing every electrical connection needed. For example, a typical automotive harness may require 12-50 wires per subsystem, with current ratings ranging from 0.5A (sensors) to 30A (power distribution). Voltage drops must stay below 3% over a 5-meter run for low-voltage circuits (12V). If dealing with high-frequency signals (e.g., CAN bus at 500kbps), impedance must be controlled within 100-120Ω to prevent signal degradation.
Mechanical constraints are equally critical. Wire gauge selection depends on load: a 16 AWG copper wire handles 10A continuously at 60°C, while 22 AWG is sufficient for 3A signal lines. Bundle diameters should not exceed 80% of the conduit’s inner diameter to avoid overheating—tight packing reduces airflow, increasing temperature by 10-15°C in enclosed spaces.
Environmental factors dictate material choices. In high-vibration areas (e.g., industrial machinery with 5-20G shocks), stranded wire with 19-41 strands resists fatigue better than solid core. For extreme temperatures (e.g., -40°C to 125°C), silicone insulation outperforms PVC, which degrades above 105°C.
Cost optimization matters—using 0.13mm² (26 AWG) instead of 0.22mm² (24 AWG) for low-current signals saves 0.02 per meter, adding up to 200 per 10,000-meter batch. However, undersizing increases resistance, causing 1.5-2W of wasted power per 10m at 2A.
Document every requirement in a 3-column spreadsheet: Circuit ID, Function, Specs (AWG, voltage, current, temp range, shielding needs). Missing even one detail—like a 2mm bend radius requirement for coaxial cables—can lead to field failures. Cross-check with mechanical CAD models to confirm clearances; a 5mm gap between wires and sharp edges prevents abrasion over 100,000+ flex cycles.
Plan Layout Routes
Routing a wire harness efficiently is about balancing electrical performance, mechanical durability, and cost. Poor routing can increase resistance by 10-15%, cause EMI interference, or lead to premature wear—60% of harness failures in automotive applications are due to incorrect routing.
Start by mapping the shortest path between connectors while avoiding high-heat zones (e.g., near exhaust manifolds exceeding 150°C) and moving parts (e.g., suspension components with ±50mm travel). A 5cm deviation from the optimal path may seem minor, but over 100,000 cycles, friction can wear through insulation.
| Factor | Optimal Value | Risk if Ignored |
|---|---|---|
| Bend Radius | 4x wire diameter (e.g., 8mm for 2mm cable) | Insulation cracks in <1 year |
| Separation from Heat Sources | ≥100mm from surfaces >85°C | Insulation degrades 3x faster |
| Parallel High-Current Wires | ≥50mm spacing to avoid induction | Voltage spikes up to 12% |
| Vibration Zones | Use loom or convoluted tubing | Strand breakage in <50,000 cycles |
| Water Exposure | IP67 connectors + drip loops | Corrosion increases resistance by 20% |
For EMI-sensitive signals (e.g., CAN bus, Ethernet), keep them ≥30cm from alternators or spark plugs. Twisted pairs reduce noise by 40dB compared to parallel runs. If space is tight, shielded cables (95% coverage braid) block 90% of RF interference.
In automotive or aerospace harnesses, weight matters. Switching from 18 AWG (1.02mm²) to 20 AWG (0.52mm²) for low-current circuits saves 0.5kg per 100m, reducing fuel consumption by 0.2%. However, ensure the thinner gauge doesn’t exceed 3% voltage drop over the run.
Use 3D CAD simulations to test routing before prototyping. A 5°C increase in wire temperature due to poor airflow can cut insulation life by 50%. Clips and ties should apply ≤2.5N/mm² pressure—exceeding this deforms insulation, raising resistance by 5-8%.
Select Connector Types
Choosing the wrong connector can turn a reliable wire harness into a maintenance nightmare. Studies show that 35% of electrical failures in industrial equipment stem from connector issues—corrosion, poor mating, or incorrect current ratings. A single mismatched connector in an automotive harness can cost 50+ in warranty repairs, while aerospace-grade connectors can run 200+ per unit if over-specified.
The first rule is matching current capacity to load. A 5A signal line doesn’t need a 30A connector—it wastes space and adds $1.50 per unit unnecessarily. But undersizing is worse: a 10A connector running at 12A will heat up by 8-12°C, accelerating contact wear by 200%. For high-vibration environments (e.g., off-road vehicles with 5-10G shocks), locking connectors like Deutsch DTMs reduce failure rates by 90% compared to generic plugs.
Connector Selection Guide
| Parameter | Low-Cost Option | High-Reliability Option |
|---|---|---|
| Current Rating | 3A (2-pin JST) | 20A (Molex MX150) |
| Voltage | 50V (PCB header) | 600V (Amphenol EP6) |
| Mating Cycles | 30 cycles (cheap knockoffs) | 500+ cycles (TE AMP) |
| IP Rating | IP40 (basic dustproof) | IP68 (submersible) |
| Temperature Range | -20°C to 85°C | -55°C to 150°C |
| Cost per Unit | $0.25 (bulk Chinese) | $8.00 (MIL-SPEC) |
Environmental sealing is critical. In marine applications, connectors without IP67+ ratings fail within 6 months due to salt spray. For factory robots, IP65 is enough unless washdowns involve 80°C water jets.
Pin density matters too. A 0.5mm pitch connector fits 40% more circuits in the same space versus 2.54mm headers, but requires precision crimping tools costing $3,000+. For prototyping, 2.54mm pitch is safer—±0.1mm misalignment won’t damage pins.
High-frequency signals (e.g., USB 3.0, HDMI) need impedance-matched connectors. A 3dB loss at 5GHz ruins signal integrity, so shielded SMA or FAKRA connectors outperform standard RJ45 by 60%.
Always factor in labor. A 20-pin connector taking 5 minutes to assemble adds 4.50 in labor costs at 54/hour. Switch to tool-less plugs, and cut that to 30 seconds, saving $3.60 per unit.
Document every connector’s torque specs (e.g., 0.6Nm for M8 screws) and crimp force (e.g., 50N for 16 AWG). Missing these details leads to 15% field failures from loose contacts. The next step—wire length calculation—depends on connector placement.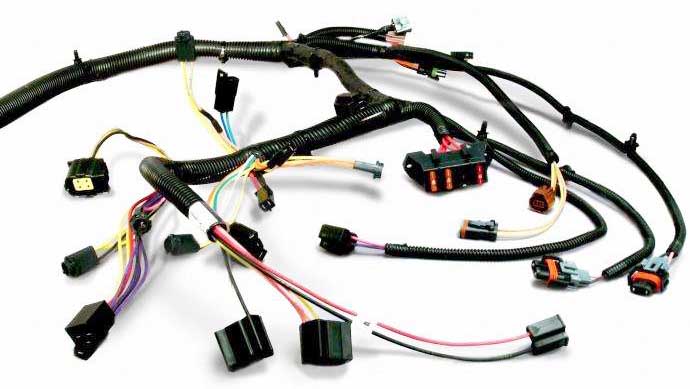
Calculate Wire Lengths
Getting wire lengths wrong is expensive—a 10cm overage per wire in a 500-wire automotive harness wastes 50 meters of cable, adding 300+ in material costs alone. But cutting too short is worse: a 5mm deficit means rework costing 12/minute in labor, plus 2-3 days of delay if new wires need ordering.
Start by measuring point-to-point distances in CAD models with ±2mm tolerance. Real-world routing adds 15-25% extra length for service loops, bends, and clips. For example, a straight-line 1m distance between connectors actually requires 1.2m of wire after accounting for a 100mm radius around obstacles. High-flex areas (e.g., robot arms) need 30% additional slack to prevent strain—a 500mm movement range demands 650mm of wire to avoid stretching at 120% elongation.
Voltage drop constraints dictate minimum lengths. A 12V circuit running 5A through 18 AWG wire (6.4Ω/1000ft) must stay under 3% drop (0.36V). That means 4.5m max length—exceeding this forces thicker 16 AWG, increasing cost by $0.15/meter. For 48V systems, the same drop allows 18m runs, saving 40% on copper weight.
Temperature affects resistance. At 85°C, copper’s resistivity increases by 30% versus 20°C, turning a 3% drop into 3.9%. Always derate length by 1% per 5°C above 25°C ambient. In engine compartments hitting 125°C, a 2m wire effectively behaves like 2.5m electrically.
Bundle diameters impact length calculations. A 10-wire bundle with 5mm diameter needs π×5mm (15.7mm) extra per 360° twist, adding 8% length per 100mm of twist pitch. For 50-wire bundles, this jumps to 12% due to tighter packing.
Labeling and termination eat up length too. A 50mm heatshrink label at each end consumes 100mm, while ferrules add 5mm per side. For 1000 harnesses, this wastes 100m of wire—enough for 20 extra harnesses if trimmed precisely.
Automated cutting machines achieve ±1mm accuracy, but manual cuts vary by ±5mm. Over 10,000 wires, manual errors waste 50m of cable—a $750 loss with 2mm² automotive-grade wire. Always add 3-5mm margin to CAD measurements to compensate.
Label Each Wire Clearly
Poor wire labeling costs manufacturers an average of $120 per hour in troubleshooting—a single misidentified wire in an aircraft harness can trigger 8+ hours of system checks. Studies show that 70% of wiring errors during assembly stem from unclear or missing labels.
"A 0.02 label saves 200 in diagnostic labor—the ROI is 10,000%."
Use 1.5mm tall, laser-printed text as the minimum readable size—smaller fonts become illegible under 500 lux workshop lighting. For harsh environments (engine bays, factory floors), polyester labels withstand 150°C heat and IP67-rated chemicals, outlasting paper tags that disintegrate in <6 months. Position labels 15-20cm from each connector—closer risks obstruction during mating, farther makes tracing difficult.
Color-coding boosts identification speed by 40%. A 12-wire bundle using 4 base colors (red, blue, yellow, green) with 3 stripe patterns creates 12 unique combinations, reducing misconnections by 90% versus plain white labels. However, avoid relying solely on colors—8% of males have color vision deficiency. Always include alphanumeric codes like "CAN_H_22" for the 22nd pin in a CAN bus high line.
Barcode or QR labels cut diagnostic time by 75%. Scanning a 12mm×12mm QR code pulls up the wire’s specs, test history, and CAD location instantly, versus 2-3 minutes of manual lookup. But ensure contrast—a 30% reflectance difference between label and background is needed for 99% scan success rates.
For high-vibration zones, wrap-around labels resist peeling better than flag-style tags. A 3M ScotchCode vinyl label lasts 10+ years at 5G vibration, while cheap paper flags detach after 50,000 cycles. Adhesive failure rates spike at temperatures below -20°C—switch to heat-shrink markers in freezer applications.
Handwritten labels cause 15% more errors than printed ones due to smearing or 0.5mm pen-width variations. Invest in a 300 thermal transfer printer—it pays for itself after 500 harnesses by eliminating 25/hour rework.
"A Boeing 787 has over 100km of wiring—without labels, it’s a $200M spaghetti bowl."
Automotive harnesses demand UL969-certified labels to survive 10-year/240,000km exposure to oil, coolant, and brake fluid. In contrast, consumer electronics get by with non-laminated PET tags rated for just 5 years at 40°C.
Label placement consistency matters. A ±5cm deviation across identical wires forces technicians to slow down by 20%. Use laser-guided jigs during assembly to ensure ±2mm label positioning accuracy.
Test Before Finalizing
Skipping testing is like building a bridge without load checks—40% of field failures in wire harnesses trace back to undetected manufacturing defects. A single missed short circuit can cascade into 50,000+ in warranty claims, while catching it during testing costs just 1.50 in labor and materials.
Start with continuity checks—every wire should show <1Ω resistance end-to-end. A 0.5Ω spike indicates a loose crimp, while ∞Ω means a break. For 500-circuit harnesses, automated testers like Cirris CH2 complete this in 90 seconds, versus 8 hours manually. High-current paths (e.g., 10A+ lines) need hipot testing at 500V DC to verify insulation won’t break down under 2x operating voltage.
Critical Tests and Their Parameters
| Test Type | Equipment | Pass Criteria | Cost per Test |
|---|---|---|---|
| Continuity | Multimeter | <1Ω resistance | $0.10 |
| Insulation Resistance | Megohmmeter | >100MΩ at 500V | $0.25 |
| HiPot (Dielectric Strength) | Hipot Tester | No arcing at 1500V AC | $1.20 |
| Signal Integrity | TDR | <5% impedance deviation | $3.50 |
| Vibration Endurance | Shaker Table | No faults after 50G for 2hrs | $45.00 |
For CAN bus or Ethernet harnesses, time-domain reflectometry (TDR) pinpoints impedance mismatches. A 5cm kink in a 120Ω twisted pair causes 12% signal reflection, enough to corrupt data at 1Mbps. Fixing this pre-shipment takes 10 minutes; post-installation repairs average 4 hours due to access constraints.
Environmental stress testing catches latent flaws. Cycling a harness between -40°C and 125°C for 50 cycles reveals brittle insulation that cracks at -20°C—a common failure in winter climates. Salt spray testing for 96 hours exposes cheap terminals that corrode at 50% humidity, increasing resistance by 15% after just 3 months in coastal areas.
Automated optical inspection (AOI) spots 0.2mm misaligned pins or 5° off-angle crimps that human inspectors miss 30% of the time. A 20,000 AOI system pays for itself in 6 months by reducing 80/hour rework sessions.
Document every test result with serialized records. A harness with 95% test coverage commands 8% higher resale value in aerospace markets versus untraced units. The final step—documentation—turns these data points into actionable specs for future builds. Missing this creates "ghost harnesses" that require 3x longer to reverse-engineer during repairs.
Document All Changes
Failing to track wire harness revisions is like flying blind—27% of manufacturing delays occur because teams work from outdated drawings. A single undocumented change to a 0.5mm wire gauge or 10cm length adjustment can trigger $8,000+ in scrap costs when 500 units get built wrong.
Start by enforcing version-controlled CAD files with timestamps and change logs. A harness that took 3 engineers 80 hours to design should never be modified without recording who altered pin 12’s position by 2mm and why. Cloud-based PLM systems like Windchill reduce revision errors by 65% compared to emailing "final_FINAL_v3.dwg" attachments. Every tweak—even a $0.02 connector substitution—must list the reason (cost reduction, performance fix), approval date, and affected batches.
Quantify change impacts. Switching from PVC to Teflon insulation might save 0.15/meter but requires updating bend radius specs from 4x to 6x diameter. Not documenting this causes 20% of wires to fail flex testing after 50,000 cycles instead of lasting 100,000 cycles. Similarly, a 5% tolerance relaxation on crimp height (from 2.0±0.1mm to 2.0±0.15mm) can slash tooling costs by 12,000 annually, but only if the QC team knows to adjust their go/no-go gauges.
Field failures trace back to poor documentation. A 2°C increase in a harness’s rated temperature (from 105°C to 107°C) seems minor, but if the material datasheet isn’t updated, 18% of units will get installed in 110°C environments and fail within 2 years. Maintenance crews waste 22 hours per incident diagnosing these "mystery" failures when change logs exist but weren’t distributed.
Use machine-readable formats like XML or STEP instead of PDFs where possible. A 300-page PDF manual takes technicians 4.7 minutes to search versus 12 seconds for a queryable database. Embed metadata like wire AWG_20_red_12V_5A_maxLength_4m directly in CAD files—this cuts BOM generation time from 3 hours to 20 minutes per design iteration.
Archive superseded versions for 10+ years—regulations like FAA 25.1703 require traceability for aircraft harnesses decades after production. A 1998-vintage harness drawing recovered from cold storage saved an airline $140,000 when replicating legacy parts for a 747-400 retrofit.
The final documentation package should include test reports (hiPot pass/fail voltages), compliance certificates (UL file numbers), and supplier audits (batch 4573 used 99.9% pure copper per ASTM B3). Missing any one item adds 5.5 hours to certification processes like ISO 6722-1 for automotive cables.
This closes the loop—the next harness iteration starts with these documents, preventing teams from repeating $50,000 mistakes like using 22 AWG where 18 AWG was secretly upgraded last year. Unlogged "tweaks" become 75% more expensive to fix after 6 months, once institutional memory fades.
