Automotive Electrical Harness | 7 Signs You Need a Replacement
Signs to replace an automotive electrical harness include visible insulation cracking (>30% surface damage) exposing wires, corroded connectors showing >0.5Ω contact resistance (measured via multimeter), frequent engine light flickering during acceleration, voltage drops over 0.3V in critical circuits, and intermittent power loss to accessories (e.g., lights, radio) on rough roads—test with a continuity checker for breaks.
Flickering or Dimming Lights
Data from diagnostic scans often shows voltage fluctuating outside the stable 13.5V to 14.5V range a healthy alternator provides, sometimes dipping below 12V under load. This inconsistent power delivery directly impacts all electrical components. For instance, a headlight that dims to 80% of its normal luminosity when you use the power windows is a classic indicator of a problem within the harness supplying that circuit, not necessarily the bulb itself.
A good circuit should have very low resistance, typically below 1 Ω. When resistance spikes to 5 Ω or higher due to corrosion or damage, it acts like a kink in a hose, severely restricting the flow of electrical current (measured in amperes, or A). This voltage drop prevents components from receiving the full power they need. For example, a headlight designed to draw 5A might only be receiving 3A, causing it to dim. The problem often worsens with specific actions like turning the steering wheel (drawing 70-90A) or activating the rear defroster (drawing 15-25A), which place a high electrical load on the system, exaggerating the voltage drop. The most common failure points are grounding points (G101, G202, etc.), which can accumulate resistance over time. A ground connection with over 0.1V of voltage drop during operation is considered faulty and needs cleaning or repair.
| Symptom | When It Occurs | Probable Cause | Voltage Reading (Engine Running) |
|---|---|---|---|
| Headlights pulse rhythmically | At idle (600-800 RPM) | Failing alternator | Fluctuates between 12.8V - 14.2V |
| Interior lights dim consistently | When applying brake pedal | High resistance in shared circuit | Drops by 1.5V+ at brake light circuit |
| All lights flicker randomly | Over rough roads | Broken wire or loose connector | Spikes or drops erratically |
| Low beam headlights are dim | All the time | Corroded ground connection | Stable at alternator, low at headlight |
The constant low voltage can damage sensitive electronic control units (ECUs), whose repair costs can exceed 500. Furthermore, the increased resistance generates heat. A connection with 5Ω of resistance carrying a 10A load will generate 500 watts of heat (using the formula P=I²R: Power=Current²xResistance), which is a serious fire hazard. Diagnosing this requires a multimeter. A voltage drop test across suspected circuits is the most effective method. If the voltage loss between the battery and the component is greater than 0.5V, the wiring must be inspected. Repairing a single section of harness can cost between 150 and $400 in labor, but it is far cheaper than replacing an alternator or an ECU damaged by prolonged electrical instability.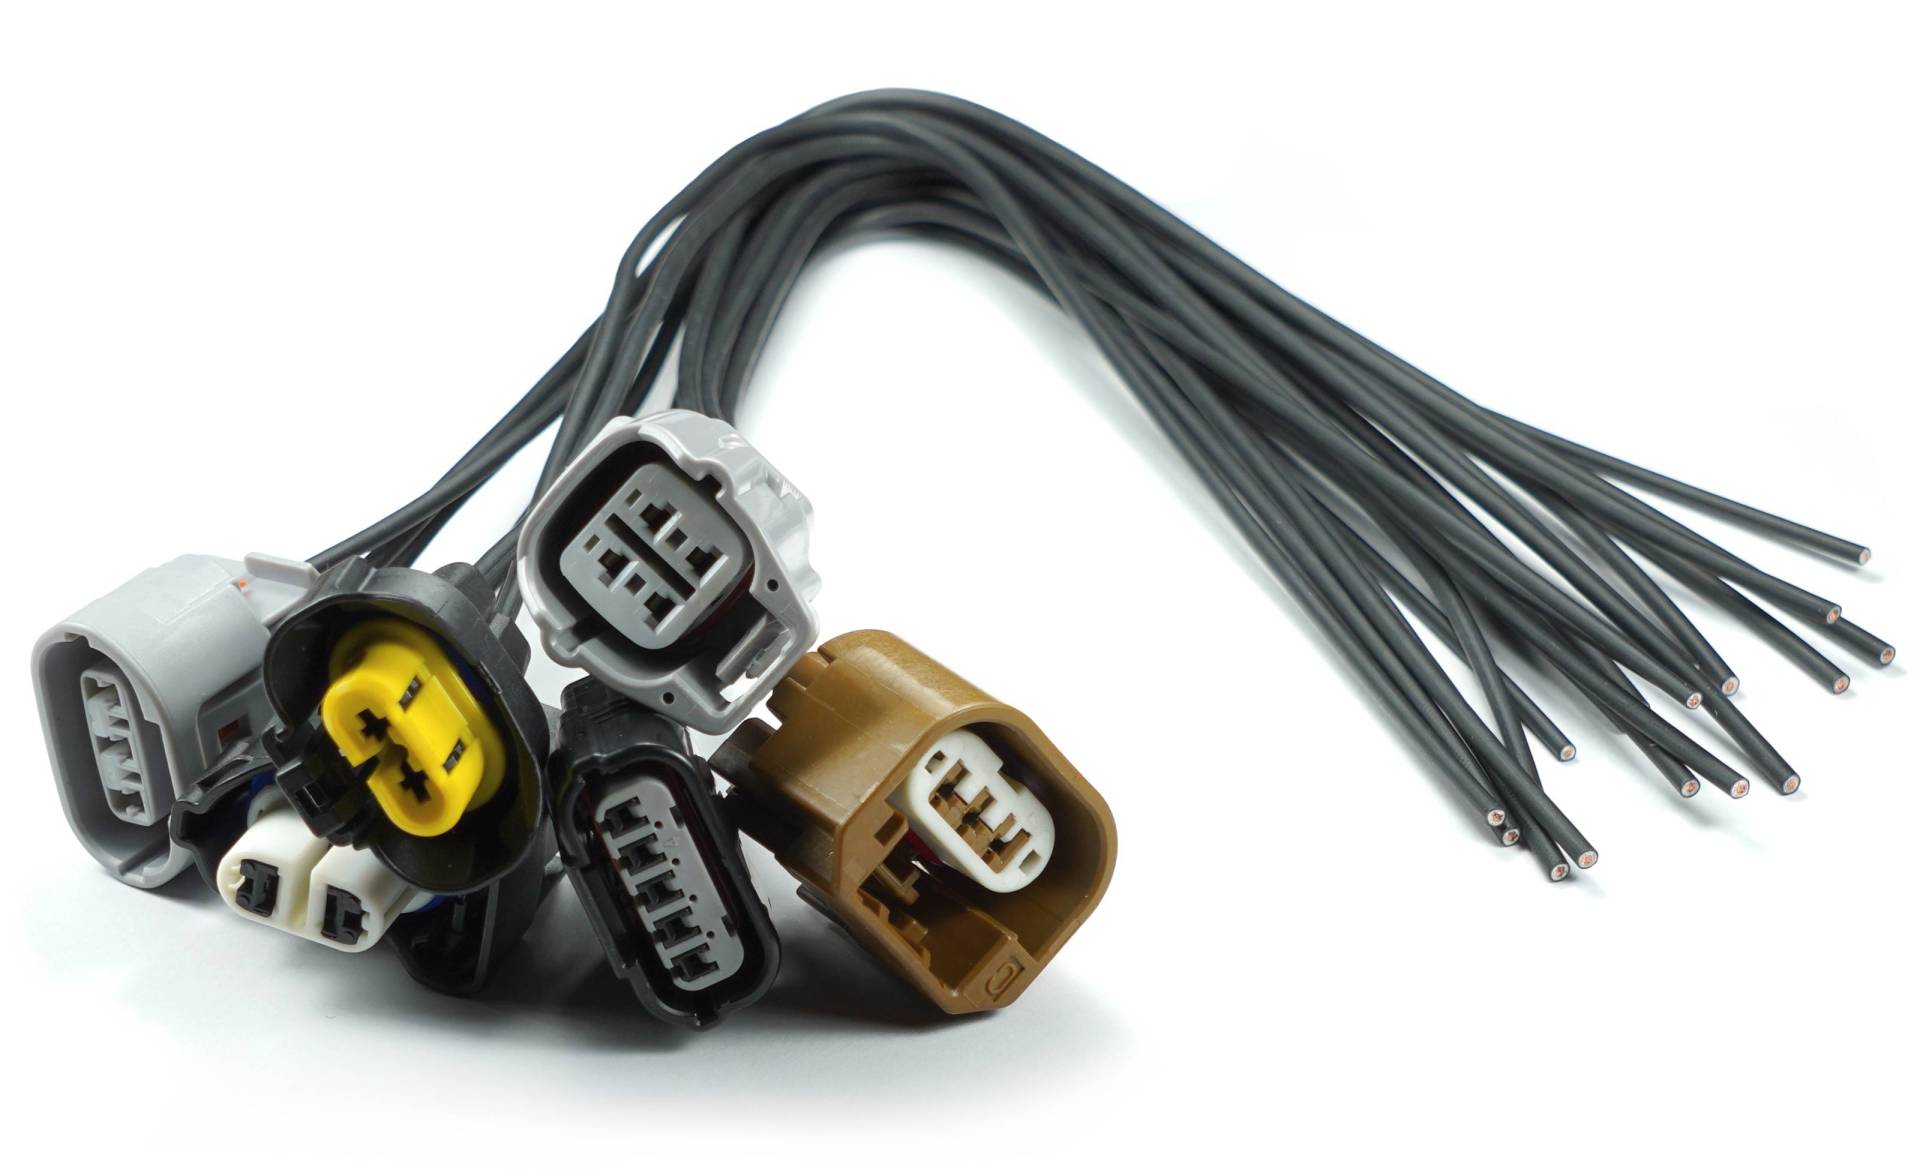
Burning Plastic Smell
This insulation is typically made from PVC (Polyvinyl Chloride) or cross-linked polyethylene, which starts to soften at around 80-90°C (176-194°F) and decomposes, releasing fumes at temperatures exceeding 150°C (302°F). This is not a smell to ignore for even a short 5-minute drive; it indicates an active electrical fault that is generating excessive heat and poses a significant fire risk. Statistics from roadside assistance calls show that over 15% of non-accident-related vehicle fires originate from electrical faults within the cabin or engine bay.
The primary culprit is almost always excessive current flow (measured in amperes, A) through a circuit that cannot handle the load, or high resistance at a connection point. For example, a wiring harness connector with corrosion or looseness can have its resistance increase from a standard 0.1-0.5 Ohms (Ω) to over 5 Ω. Using the power formula (P = I²R), a circuit drawing 10 amps through a 5 Ω connection generates 500 watts of heat—comparable to a small space heater focused on a single, plastic connector. This intense thermal energy rapidly raises the local temperature beyond the insulation's melting point of 90°C. The most vulnerable areas are behind the dashboard (where numerous harnesses converge with a wire density of 15-20 wires per bundle), near the battery (where maximum current flow exceeds 100A during engine crank), and at the fuse box connections.
| Smell Characteristic | When Noticed | Probable Source | Immediate Action |
|---|---|---|---|
| Sharp, acrid plastic | During or after using a specific accessory (e.g., heater fan, defroster) | Overheating blower motor resistor (often drawing 15-20A) | Discontinue use of the accessory. Check fuse rating. |
| Sweet, chemical smell | Constant, but stronger during acceleration | Melting insulation near exhaust manifold (temps > 600°C / 1112°F) | Inspect engine bay harness routes for heat shield damage. |
| Burnt, smoky plastic | After several minutes of driving | Overloaded circuit (e.g., aftermarket accessory wired incorrectly) | Identify and disconnect the non-factory device. |
| Faint, intermittent smell | Only with A/C on | Foreign debris on heater core or electrical component | Inspect cabin air filter and HVAC intake for obstructions. |
The cost of ignoring this is high: repairing a single melted connector and a short section of wire may cost between 500. In contrast, if the overload damages an electronic control unit (ECU), which operates at voltages between 5V and 12V with very low tolerance for power spikes, the repair cost can easily exceed $1,200. Using a thermal imaging camera to scan the fuse box and harness connectors for hotspots exceeding 85°C (185°F) is the most effective method for pinpointing the fault before catastrophic failure occurs.
Visible Wire Damage
Studies of electrical failures show that over 30% of non-accident-related issues stem from physical wire damage, with the highest incidence occurring in vehicles aged 7-12 years. The insulation, typically PVC or thermoplastic, degrades over time due to a combination of factors: under-hood temperatures that regularly cycle between -40°C and 120°C (-40°F to 248°F), exposure to ozone, and constant vibration at frequencies between 10-100 Hz. This leads to embrittlement, causing the insulation to crack and split, often along wire bends with a radius of less than 3 times the diameter of the wire itself.
A clean copper connection has a resistance of less than 0.1 Ohms (Ω). A corroded connection can exhibit resistance exceeding 5-10 Ω. This creates a significant voltage drop at the component and, crucially, generates intense heat. For example, a power seat motor designed to draw 15A through a corroded, 5Ω connection will generate 1,125 watts of heat (P = I²R = 15² * 5) directly at the fault point. This is sufficient heat to melt surrounding plastics and ignite flammable materials. The most vulnerable wires are those subject to the highest mechanical stress:
- Chafing: Wires rubbing against a sharp body panel bracket can wear through the 0.5mm - 2.0mm thick insulation in less than 18 months.
- Tension: Connectors pulled tight with less than 5mm of slack can stress the terminations, increasing resistance by over 300%.
- Heat Cycling: Areas near exhaust manifolds (temperatures > 600°C / 1112°F) bake the insulation, reducing its lifespan by 60-70%.
The cost to repair a single chafed wire by splicing in a new section is typically between 150 and 300. However, if that damaged wire shorts to ground, it can instantly blow a fuse. If the short occurs repeatedly, it can overload and destroy the integrated circuit inside a body control module (BCM), which can cost over 800 for a new unit plus several hours of programming labor, pushing the total repair bill beyond 1,500. The most effective prevention is a visual inspection every 12 months or 15,000 miles, focusing on areas where wires pass through metal body panels; these grommets often fail, allowing the sharp metal edge to act like a saw on the wiring over thousands of engine vibrations.
Electrical Components Failing
Data from automotive diagnostic systems indicates that in over 65% of cases where owners report two or more unrelated electrical glitches, the problem is traced back to a faulty ground connection or a corroded terminal in a wiring harness connector, not a failed module. These issues are most prevalent in vehicles with an average age of 8 to 10 years, where connectors have endured over 100,000 miles of vibration and 2,500-3,000 thermal cycles, leading to terminal fatigue and oxidation.
A single ground point, like G102 typically located on the engine block, might be responsible for providing a return path for currents from up to 15 different components, totaling perhaps 40 amps. When that ground point corrodes, its resistance can skyrocket from a negligible 0.02 Ohms (Ω) to 2 Ω or more. This creates a common ground fault, causing a shared voltage drop that affects every component on that circuit. For example, when you power the 20A seat motor, the voltage for the 5A radio might momentarily dip from 12.8V to 9.5V, causing it to reboot. The symptoms are often intermittent because vibration and temperature changes momentarily alter the resistance of the faulty connection. The most common failure modes include:
- Intermittent Operation: A power window that works only 70% of the time, often correlating with outside air temperatures below 10°C (50°F), indicating connector contraction increasing resistance.
- Unexpected Resets: A navigation system that reboots when you hit a bump, suggesting a high-resistance connection that is physically disrupted by vibration.
- Illogical Behavior: The interior lights dimming when you activate the turn signal, indicating a shared ground path with excessive resistance (often > 0.5V drop when measured).
Blown Fuses Repeatedly
A fuse that blows once might be an anomaly, but if you're replacing the same 10A or 15A fuse for a specific circuit more than twice in a short period, it's a definitive diagnostic sign of a deeper electrical problem. Fuses are designed to be the weakest link, sacrificing themselves to protect the more expensive wiring and components. The average vehicle has between 30 to 50 fuses in its power distribution center, each calibrated to tolerate a specific amperage for a limited time—typically 135% of its rating for a maximum of 60 minutes before melting. Repeated failure indicates a consistent abnormal current flow, or overcurrent, that is overwhelming the circuit's designed protection. Data from repair shops shows that in over 80% of cases involving recurrent fuse failure, the culprit is not the fuse itself but a fault in the wiring harness or a connected component.
This creates a path of extremely low resistance, often below 1 Ohm (Ω). Using Ohm's Law (I = V/R), a 12V system with a 0.1Ω short circuit would theoretically attempt to draw 120 amps of current—far exceeding the capacity of a 10A fuse, which will blow in under 0.1 seconds to protect the harness from melting. The other cause is a faulty component, like a blower motor with worn bearings. This motor may be designed to draw 5A normally but could draw 18A under strain, consistently overloading a 15A fuse after running for 3-4 minutes.
| Fuse Rating | Blow Time | Probable Cause | Current Draw (Estimated) |
|---|---|---|---|
| 5A - 10A (Lighting) | Instantly ( < 1 sec) | Short to ground in wire harness | > 50A |
| 15A - 20A (Power Accessories) | After several minutes of use | Failing motor (window, seat, fan) | 125% - 150% of fuse rating |
| 25A - 40A (Heavy Duty) | Intermittently, under specific load | Intermittent short due to chafing | Spikes exceeding 150% of rating |
Diagnosing this requires a systematic approach:
- Identify the Circuit: The fuse map in your owner's manual is the first step. Note all components on the failed fuse's circuit; the problem is with one of them or the wiring in between.
- Visual Inspection: With the fuse removed and the ignition off, visually inspect the wiring for the affected circuit, looking for chafed wire insulation or melted connectors, especially where wiring passes through bulkheads or sharp metal edges.
- Multimeter Test: Use a multimeter to measure the resistance between the fuse terminal (with the fuse removed) and ground. A reading of very low resistance (e.g., 0.5 Ω or less) confirms a short circuit. A reading of several Ohms might point to a failing component.
The wiring for a 10A circuit is designed to safely carry only about 11A continuously. Installing a 20A fuse removes the safety margin and allows the wire to overheat, potentially generating enough heat to melt insulation and ignite surrounding materials. The cost of finding and repairing a short circuit is typically between 600. In contrast, the cost of repairing fire damage or replacing an entire melted harness can easily exceed $3,000.
Battery Draining Quickly
Waking up to a dead battery once is inconvenient, but if your vehicle's battery consistently loses charge and fails to start the engine after sitting for just 12-24 hours, you have a significant parasitic drain. A modern vehicle's electrical system is never fully off; it enters a "sleep" mode where the total current draw should drop to a very low level, typically between 0.020A and 0.040A (20 to 40 milliamps), within 30-45 minutes of the ignition being turned off and the doors locked. This small amount of power supports essential functions like your security system and memory modules. However, a fault in the wiring harness or a malfunctioning module can prevent this sleep mode from activating, leading to a sustained and excessive drain that can completely discharge a standard 48Ah (Amp-hour) battery in less than 24 hours instead of the normal 3-4 weeks.
The most common culprit is a parasitic drain exceeding 0.1A, which is enough to kill a healthy battery overnight. Identifying the source requires a multimeter capable of measuring current in the 10A range. The diagnostic process involves physically disconnecting the negative battery terminal and connecting the meter in series to measure the total current flow out of the battery after the vehicle has fully entered its sleep mode. A reading of 0.08A (80mA) is cause for concern, and anything above 0.15A (150mA) will definitively cause a no-start condition. The challenge is that over 50 circuits and 30 electronic modules could be responsible. The most frequent offenders are faulty alternator diodes, which can create a reverse current path that draws 0.3A to 0.7A continuously, or a trunk light switch that fails to turn off, drawing a constant 1.5A. Problems within the wiring harness itself, such as a chafed wire touching the body, can create a subtle short circuit that draws a steady 0.5A.
The definitive test for a parasitic drain requires a digital multimeter. Set it to the 10A DC setting. Disconnect the negative battery cable, connect the red meter lead to the negative battery post, and the black lead to the disconnected cable. Wait 45 minutes for modules to sleep. A reading above 0.050A (50 milliamps) indicates a problem that needs investigation.
When pulling a specific 10A fuse for the interior lights causes the current draw to drop from 0.6A to 0.03A, you've found the faulty circuit. The repair cost is highly variable. Replacing a 50 glove box light switch is inexpensive, but if the drain is traced to a faulty infotainment module that fails to sleep and draws 1.2A, the replacement cost can exceed 1,200, including programming. Ignoring the problem leads to repeated battery replacements—a deep discharge below 10.5V can permanently damage a new $200 battery, reducing its capacity by over 40% in just a few cycles.
Check Engine Light On
While it can signal issues within the engine or emissions system, a significant portion—estimated at over 25%—of all CEL triggers are fundamentally caused by electrical faults within the sensor circuits or the wiring harness itself. Modern engines rely on a network of over 15-20 sensors, each sending precise voltage signals (typically a range of 0.1V to 5.0V) to the Engine Control Unit (ECU) to manage everything from fuel injection timing to emissions control. The ECU constantly monitors these signals for rationality and range. When a sensor's voltage reading falls outside its expected parameters for more than two consecutive drive cycles, it stores a Diagnostic Trouble Code (DTC) and illuminates the light. A faulty wiring harness can corrupt these low-voltage signals, misleading the ECU into detecting a problem that doesn't originate from the sensor or component itself.
A high resistance connection in a sensor's 5-volt reference circuit, often caused by terminal corrosion or a loose pin fit, can increase resistance from a normal value of less than 1 Ohm (Ω) to 10-15 Ω. This creates a significant voltage drop, causing the sensor to report a value that is 0.3V to 1.2V lower than actual conditions. For example, a Mass Air Flow (MAF) sensor that reads 1.15V at idle instead of the expected 1.8V due to a corroded connector will cause the ECU to calculate a 25% lower air intake volume. This leads to a lean fuel mixture, engine misfires, and codes like P0171 (System Too Lean). Conversely, a short to ground in a heater circuit for an oxygen (O2) sensor, which should draw 1.2A, might draw 3.5A, triggering a specific heater circuit code like P0036. These electrical issues are often intermittent, causing the light to turn on for a few days, then turn off for a week, only to return when humidity exceeds 80% or ambient temperatures drop below 5°C (41°F), which affects the conductivity of corroded connections.
If the Throttle Position Sensor (TPS) shows a value that jumps from 12% to 48% without moving the pedal, the issue is likely a broken wire strand or an intermittent short inside the harness. Repairing a single sensor circuit by cleaning a connector or splicing a new section of wire typically costs between 350 in labor. However, if the electrical fault causes a persistent lean condition, it can lead to secondary damage like catalytic converter overheating, reducing its efficiency by over 40% and leading to a replacement cost of 2,200. Using a multimeter to perform a voltage drop test on the sensor's circuit under load is the most reliable method to confirm a harness problem, ensuring the power and ground wires deliver a stable 5.0V with less than a 0.1V loss.
Identifying when to replace an automotive electrical harness hinges on seven critical signs: flickering lights dimming >30% at constant load, a burning plastic smell (indicating insulation degradation at >80°C), visible wire damage (e.g., >5mm² insulation breach), frequent component failures (>2/month), repeated fuse blows (>1/circuit/month), battery drain (>50mA static current vs. <5mA normal), and a check engine light triggered by harness-related DTCs (e.g., P0562 voltage faults).
