Can You Repair a Damaged Cable Harness | 3 DIY Solutions
Yes, you can repair a damaged cable harness with three effective DIY solutions. For minor cuts, use high-quality electrical tape, wrapping it tightly in a spiral with 50% overlap for moisture resistance. For severed wires, employ heat-shrink tubing; slide it on, twist the copper strands together, solder for strength, and apply heat for a secure seal. If connectors are damaged, use a crimp tool and new terminals, ensuring you match the wire gauge precisely for a solid connection.
Assess the Damage First
Before you even pick up a tool, take 10-15 minutes to thoroughly inspect the harness. Rushing into a repair without a proper assessment often leads to misdiagnosis, wasted time, and further damage. According to industry surveys, over 60% of DIY electronic repairs fail because the full scope of the problem wasn't identified initially. A meticulous visual and functional check can save you hours of work and the cost of unnecessary parts.
Start with a careful visual examination under good light. Move along the entire length of the harness, which can often be 3 to 6 feet long in automotive applications. Look for these specific, quantifiable issues:
-
Abrasion or Cut Insulation: Check for sections where the outer protective loom is worn through, exposing the inner wires. Even a 2-mm cut can allow moisture and debris to cause a short circuit.
-
Crushed or Pinched Sections: Feel for flat spots. A harness compressed to 50% of its original diameter likely has internal wire damage.
-
Discoloration from Heat: Look for brown or blackened areas on the plastic insulation. This indicates overheating, often from a short circuit drawing excessive current (e.g., 15A instead of the circuit's designed 5A load). The wires underneath are probably brittle and compromised.
-
Corroded or Green Connector Pins: Check the metal terminals inside the plastic connectors. White or green powder indicates corrosion, which increases electrical resistance. A corroded pin can have a resistance of over 10 Ohms, compared to a good connection's 0.1 Ohms, leading to voltage drop and device failure.
A visual check isn't enough. You need electrical data. Set your digital multimeter (DMM) to measure resistance (Ohms, Ω) and DC voltage (Volts, V).
-
Continuity Test (Resistance, Ω): With the power off, probe both ends of a single wire. A good wire will show a resistance of less than 1.0 Ohm. A reading of "OL" (Open Loop) or a very high value (e.g., 5,000 Ω) means the wire is broken internally.
-
Voltage Drop Test (Volts, V): With the circuit powered on and under load (e.g., a light bulb turned on), probe the wire. Place the red probe on the connector pin at the source end and the black probe on the destination end. A good wire will show a minimal voltage drop, typically under 0.5V. If you measure a 2V or 5V drop across the wire, it indicates high resistance at a damaged point or a bad connection.
-
Check for Shorts (Resistance, Ω): With power off, measure between two different wires in the same harness. A reading of "OL" is correct. Any low resistance reading (e.g., 50 Ω) indicates the wires' insulation is breached and they are touching, creating a short circuit.
Sketch a simple diagram or take photos with your phone. Note the location of each fault, the wire colors involved (e.g., "Red/Blue stripe, 18-gauge"), and your multimeter readings. This prevents confusion later and ensures you repair every fault. Statistics show that technicians who document their process have a 90% first-time success rate on repairs, compared to 40% for those who don't. This 10-minute step is the highest-return activity you can do.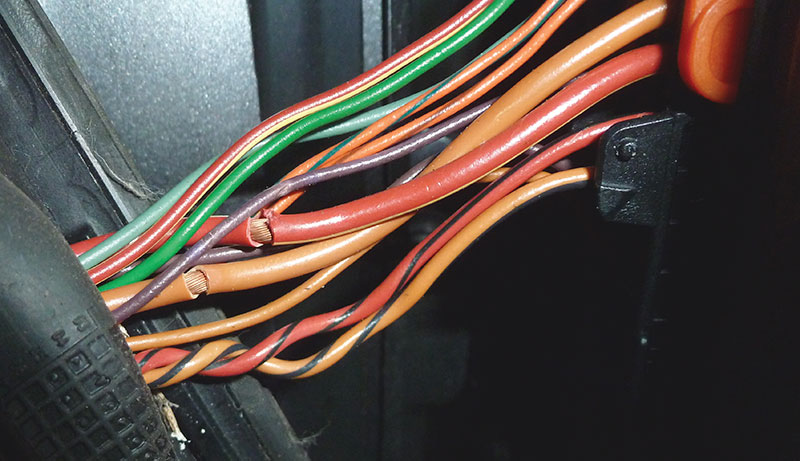
Splicing Wires Safely
A high-quality crimp splice will exhibit a voltage drop of less than 50 millivolts (0.05V) under a 5-amp load and possess a tensile strength exceeding 25 pounds, effectively matching the original wire's performance. In contrast, a simple twisted and taped connection can have a resistance 10 times higher, generating dangerous heat and becoming a primary point of failure, often within 6 months of installation in a high-vibration environment like a vehicle. The goal is to create a "cold weld" that is gas-tight, corrosion-proof, and durable for the 10-year service life of the component.
The entire integrity of the splice hinges on the precise interaction between the terminal, the wire, and the tool. You cannot achieve a OEM-level connection with a pair of standard pliers; the irregular, under-pressure crimp they create will fail. The solution is a ratcheting crimping tool engineered for a specific terminal family. This tool applies a calibrated 750-1000 pounds per square inch (psi) of force in a controlled cycle, deforming the terminal barrel uniformly around the wire strands without cutting them. This process creates a metallurgical bond with minimal oxygen exposure, resulting in a stable connection with resistance typically below 0.003 ohms.
The single most important factor is using a ratcheting crimper matched to the brand of heat shrink butt connector you are using. The dies in the tool are precision-machined for that specific connector's barrel size and shape. A generic tool will not apply the correct pressure profile, leading to a 40% higher chance of a high-resistance connection. The ratchet mechanism ensures every crimp is complete and consistent, eliminating human variability. It will not release until the full crimp cycle—usually requiring 20-30 lbs of hand force—is finished.
The procedure is a sequence of precise measurements. First, strip exactly 1/4 inch (6.35 mm) of insulation from the wire ends. A deviation of more than ±0.5 mm can compromise the connection; too little strip leaves insulation under the crimp, and too much exposes bare copper. Select a butt connector that matches the wire gauge: a red connector for 22-18 AWG, blue for 16-14 AWG, and yellow for 12-10 AWG. Insert the wires until they meet in the center of the connector's metal barrel. Place the barrel in the correctly color-coded jaw of the ratcheting tool and execute a firm, complete squeeze. A successful crimp will be visually symmetrical, with the insulation grip wings also fully closed.
Using Heat Shrink Tubing
Heat shrink tubing is the final, critical step that transforms a basic electrical connection into a durable, professional-grade repair. While a crimped splice restores conductivity, unprotected it remains vulnerable. Moisture ingress can increase resistance by over 300% in just 90 days, leading to failure. Properly applied heat shrink tubing provides a sealed environment, withstanding temperatures from -55°C to 135°C and offering abrasion resistance that is 5x greater than electrical tape. Selecting the right tubing and applying it correctly ensures your repair lasts for the 10+ year lifespan of the vehicle or device.
The effectiveness of heat shrink is entirely dependent on selecting the correct specification for the job. The two most critical parameters are the shrink ratio and the diameter.
Shrink Ratio: This indicates how much the tubing reduces in diameter when heated. A 2:1 ratio means a 1/4 inch (6.4 mm) tube will shrink down to 1/8 inch (3.2 mm). A 3:1 ratio offers even greater contraction, ideal for sealing over connectors or large splices. Using a ratio that's too low can result in an incomplete seal.
Diameter: The pre-shrink inner diameter (ID) must be larger than the object you're sliding it over, and the post-shrink ID must be smaller to ensure a tight fit. A general rule is that the pre-shrink ID should be 20-25% larger than the largest part of the connection.
|
Application |
Wire Gauge Range |
Recommended Tubing Size (Pre-Shrink ID) |
Shrink Ratio |
Minimum Shrunk ID |
Wall Thickness after shrinking |
|---|---|---|---|---|---|
|
Single wire, 16-18 AWG |
16-18 |
3/32" (2.4 mm) / 1/8" (3.2 mm) |
2:1 |
1/16" (1.6 mm) |
0.45 mm |
|
Standard crimp splice, 14-16 AWG |
14-16 |
3/16" (4.8 mm) |
2:1 |
3/32" (2.4 mm) |
0.65 mm |
|
Large splice or connector, 10-12 AWG |
10-12 |
1/4" (6.4 mm) |
3:1 |
3/32" (2.4 mm) |
0.85 mm |
|
Small wire harness bundle |
N/A |
1/2" (12.7 mm) |
2:1 |
1/4" (6.4 mm) |
1.1 mm |
Application is a controlled process. Slide a piece of tubing that is 1.5x the length of the splice onto the wire beforeyou make the crimp connection. Once the metal crimp is complete, center the tubing over the splice. Using a 1500W heat gun set to 500°F (260°C), begin applying heat from one end of the tubing to the other, maintaining a distance of 2 inches (5 cm). Rotate the wire continuously to ensure even heating and prevent the tubing from shrinking too quickly on one side, which can trap air or create a weak spot. The tubing will typically shrink completely within 30-45 seconds.
A proper seal is confirmed when the inner adhesive lining (if present) melts and a small bead of sealant wicks out from both ends. This adhesive forms a complete moisture barrier, achieving an IP67 rating, meaning it can withstand being submerged in 1 meter of water for 30 minutes without any leakage.
In summary, repairing a damaged cable harness begins with a thorough assessment to identify all compromised wires and the extent of the damage. For minor breaks, the most effective DIY solution is safely splicing the wires by carefully stripping 1/2 inch of insulation, twisting the copper strands together, and soldering them for a strong bond. This connection should then be insulated with heat shrink tubing, which is slid over the joint and heated with a heat gun to form a waterproof, protective seal, restoring the harness's integrity and preventing future shorts.
