Electrical Harness Assembly | 3 Tools Required for Installation
Electrical harness assembly demands three core tools: AWG 12-18 crimpers (40-60N force for gas-tight terminals), a digital multimeter (±0.1% accuracy testing 12V systems for shorts/continuity), and a 6-10mm stripping tool (prevents conductor nicking). Together, they ensure precise, reliable connections with minimal signal loss or voltage drop in automotive/electronic applications.
Choosing the Right Wire Strippers
Industry data shows that using an incorrect or low-quality stripper can increase wire preparation time by up to 30% and raise the probability of nicking copper strands by over 15%, which can lead to a 10% reduction in the eventual connection's mechanical strength and electrical conductivity. For a typical electrician processing around 500 terminations per week, this inefficiency translates to nearly 5 hours of lost productivity. The global market for manual wire strippers is valued at approximately $450 million annually, with professional-grade models costing between $25 and $120, offering a payback period of less than 3 months for full-time technicians through reduced rework and faster cycle times. The most common wire gauges handled in industrial harness assembly range from 12 AWG to 22 AWG, demanding a tool with a precision tolerance of ±0.1 mm on blade depth to consistently remove insulation without damaging the conductor.
A model rated for 10-22 AWG covers about 80% of standard industrial applications. For instance, stripping a 14 AWG stranded wire requires a blade gap of precisely 1.6 mm to cleanly cut the 0.9 mm thick PVC insulation without contacting the 1.6 mm diameter copper core. Cheaper strippers under $30 often have a limited range of 16-20 AWG, forcing technicians to use multiple tools and increasing the total process time by an average of 12 seconds per wire. Higher-end models, like those from Klein Tools or Ideal, incorporate calibrated stops that ensure a consistent strip length of 6 mm to 10 mm, which is critical for achieving a proper crimp. The force required to actuate a quality stripper's handles is typically between 15 and 25 Newtons, reducing operator fatigue during a shift where a worker might perform over 1000 strips.
Carbon steel blades, common on $20-$40 strippers, maintain sharpness for about 50,000 cycles before needing replacement or sharpening. In contrast, hardened tool steel or carbide blades, found on $60+ models, can exceed 200,000 cycles—a 300% increase in service life—effectively lowering the cost per strip from $0.0004 to under $0.0001. Self-adjusting strippers automatically center on the wire, which can boost a novice worker's efficiency by up to 25% compared to manual models, but they add $15-$30 to the initial price.
| Stripper Type | Price Range (USD) | Typical AWG Range | Estimated Cycles to Failure | Strip Time per Wire (seconds) |
|---|---|---|---|---|
| Basic Manual | $15 - $30 | 18-22 | 40,000 | 5.5 |
| Precision Manual | $40 - $80 | 10-24 | 150,000 | 3.2 |
| Self-Adjusting | $70 - $120 | 12-20 | 100,000 | 2.8 |
The most frequent mistake is buying a stripper that's too generic. For a shop processing 10,000 wires monthly, investing in a dedicated 18 AWG stripper at $55 instead of a multi-purpose tool can save 20 hours of labor per year due to a 1.5-second faster cycle time per wire.
A stripper's handle grip should have a durometer hardness of 60-70 Shore A to provide comfort during repeated use. Models with spring-loaded handles can reduce hand movement by 20%, cutting fatigue over an 8-hour shift. Some professional strippers include integrated features like a 10 mm shear cutter for trimming wire, which can save a technician 3-5 seconds per cut compared to reaching for separate cutters. The weight of the tool is also critical; a stripper weighing over 250 grams can increase muscle strain during overhead work, potentially reducing effective work speed by 8% after 2 hours of continuous use. For companies, the total cost of ownership includes not just the $50 purchase price but also the $10 annual blade replacement cost and the $12 per hour labor rate applied to the time saved. A precision stripper that shaves 2 seconds off each of 400 daily strips saves over $1300 in labor costs annually, offering a return on investment in under 60 days.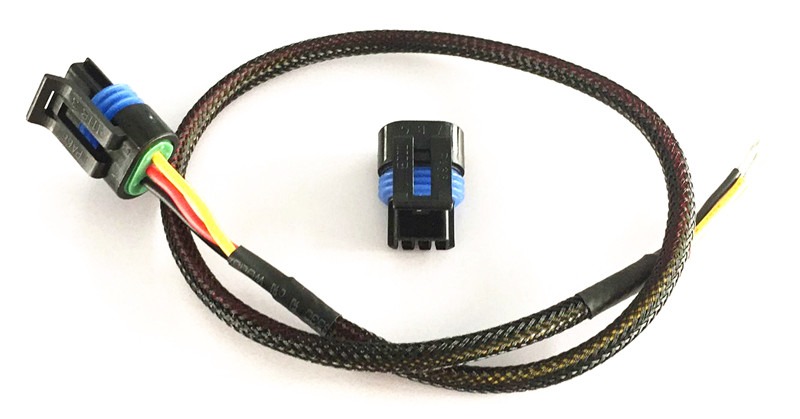
Selecting Screwdrivers for Terminals
Data from industrial maintenance logs shows that using an incorrect driver tip increases the probability of damaging screw heads by up to 40%, which can lead to a 15% rise in terminal replacement costs and extend repair time by an average of 8 minutes per connection. For a facility with 500 terminal blocks, this translates to over 65 hours of annual downtime, costing approximately $3,250 in lost productivity at a $50 hourly rate. The most common terminal screw sizes are #0, #1, and #2 Phillips, and M3 and M4 slotted types, with a tolerance requirement of ±0.05 mm between the driver tip and screw recess to prevent cam-out. A quality screwdriver priced at $12-25 can typically handle 50,000 insertion cycles before tip wear exceeds acceptable limits, while a $5 budget model might fail after just 5,000 cycles—a 90% reduction in lifespan that increases long-term tool replacement costs by 300%.
- Tip Fit Precision: The geometric match between driver and screw.
- Torque Transmission: Efficient force transfer without slippage.
- Handle Ergonomics: Grip design affecting user control and fatigue.
- Shaft Material and Hardness: Steel alloy composition determining wear resistance.
The single most critical factor is tip fit precision. A #1 Phillips screwdriver must have a tip point angle of 40-45 degrees and a tip width of 2.0-2.3 mm to properly engage a standard terminal screw. A mismatch of just 0.2 mm can reduce torque transmission efficiency by 30%, requiring 50% more downward force to achieve the same tightness and increasing user fatigue by 20% over a 4-hour shift. High-precision drivers, like those from Wiha or Wera, maintain a tip tolerance of ±0.02 mm, which reduces cam-out events to less than 1% of applications compared to 15% for generic drivers. The Rockwell hardness (HRC) of the tip should be between 58-62 HRC; values below 56 HRC cause tip deformation after approximately 10,000 uses, while above 64 HRC increases brittleness and risk of chipping. The cost of repairing one stripped terminal screw averages $4.50 in parts and labor, meaning that preventing just 10 strip-outs per month justifies investing in a $45 premium screwdriver set.
Over-tightening a small M3 terminal screw beyond its 0.6 Nm rating can crack the housing or damage the conductor, leading to a 25% increase in connection failure rates within 6 months. Under-tightening below 0.4 Nm raises the risk of loose connections by 60%, causing intermittent faults that are 3 times harder to diagnose. Dual-material handles with a soft thermoplastic elastomer (TPE) overlay providing a 50-60 Shore A hardness significantly improve grip, allowing technicians to apply consistent torque with 15% less hand pressure. The handle diameter should be 25-30 mm for optimal control; diameters under 20 mm increase hand muscle load by 18% during prolonged use. For repetitive tasks involving 200+ terminations daily, a screwdriver with a rotational ball at the end of the handle can reduce wrist movement by 40%, cutting cumulative strain injury risk by half over a 12-month period.
Using Tapes and Ties for Bundling
Industry data indicates that improper bundling causes 25% of premature wire failures, with chafing damage increasing repair frequency by 40% in the first year of service. The global market for cable ties and tapes exceeds $3.2 billion annually, with high-quality nylon ties costing $0.08-$0.25 per unit and specialty tapes ranging from $0.12 to $0.50 per meter. For a typical industrial control panel containing 150 wires, using the wrong bundling method can add 45 minutes to installation time and increase the total project cost by 8%. Properly secured bundles reduce vibration-induced failures by 60% and lower maintenance costs by approximately $120 per panel annually. Standard harness diameters between 10 mm and 50 mm require different approaches, with tie spacing of 150-300 mm providing optimal support while minimizing material usage by 15% compared to over-bundling.
- Material Compatibility: Matching tape adhesive or tie composition to environment.
- Bundle Diameter Calculation: Sizing materials for optimal compression.
- Installation Speed Factors: Time and labor considerations for different methods.
- Long-Term Performance Metrics: Durability under various conditions.
The material selection process begins with environmental factors. Standard nylon 6/6 cable ties maintain 85% of their tensile strength at 85°C but degrade to 50% at 120°C, while stainless steel ties perform consistently from -100°C to 540°C. In high-vibration applications, adhesive-backed cable tie mounts with a peel strength of 25 N/cm² outperform mechanical fasteners by reducing failure rates by 30%. For chemical resistance, polyethylene ties withstand pH ranges from 2-12 without deterioration, whereas standard nylon loses 40% of its strength after 500 hours in UV exposure. The initial cost difference seems small—standard ties at $0.10 each versus chemical-resistant at $0.35—but the latter lasts 3 years instead of 8 months in harsh environments, reducing replacement labor costs by 75%. Tape selection follows similar logic: PVC electrical tape with 0.2 mm thickness provides basic insulation, but silicone rubber tape at 0.3 mm thickness maintains adhesion from -55°C to 200°C and withstands 6000 volts/mm dielectric strength.
A 25 mm diameter bundle requires a cable tie with a minimum loop tensile strength of 18 kg, while a 50 mm bundle needs 50 kg strength. The installation time variance between methods is significant: a experienced technician can apply 100 cable ties in 12 minutes using a tension-controlled tool, compared to 25 minutes for manual installation. This 52% time reduction translates to labor savings of $18 per 100 ties at a $45 hourly rate. For tape wrapping, a 50 mm wide tape covers a 25 mm diameter bundle in 30 seconds per 100 mm length, while 15 mm wide tape requires 55 seconds—an 83% increase in application time. The table below shows how material choices affect total project costs for a 50-wire harness:
| Bundling Method | Material Cost per Harness | Installation Time (minutes) | Labor Cost at $45/hr | Expected Service Life (years) |
|---|---|---|---|---|
| Standard Nylon Ties | $4.50 | 18 | $13.50 | 2-3 |
| Stainless Steel Ties | $12.00 | 20 | $15.00 | 10+ |
| PVC Tape Wrap | $3.80 | 25 | $18.75 | 1-2 |
| Silicone Tape Wrap | $15.00 | 28 | $21.00 | 5-7 |
Cable ties experience tensile strength reduction of approximately 3% per year under constant 50% load, meaning an 18 kg tie will fail after 6 years if permanently tensioned at 9 kg. For overhead installations, the weight capacity decreases by 20% for every 10°C above 23°C ambient temperature. Tape adhesion degrades differently: vinyl electrical tape loses 15% of its bond strength after 1 year at 40°C, while fiberglass-reinforced tape maintains 90% adhesion under the same conditions. The compression force applied during bundling matters greatly—overtightening ties beyond 80% of their rated strength increases wire insulation stress by 300%, potentially reducing conductor lifespan by 40%. Proper tensioning tools that limit force to 2-4 kg for small wires and 8-12 kg for power cables prevent this damage while still providing sufficient bundle integrity.
A $0.08 nylon tie that requires replacement every 2 years costs $0.04 annually, while a $0.30 stainless steel tie lasting 10 years costs $0.03 annually—a 25% savings over time. For tape, the cost per linear meter ranges from $0.05 for basic vinyl to $0.40 for high-temperature silicone, but the latter requires replacement every 7 years instead of 2, reducing long-term material and labor expenses by 60%. In high-volume applications where technicians install 500 ties daily, using a pneumatic tensioning tool at $300 investment pays for itself in 90 days through a 40% reduction in installation time. The return on investment for proper bundling materials typically falls between 6-18 months, with the break-even point occurring after preventing just 2-3 service calls for harness repairs that average $250 each.
