How Much Does a Custom Car Wiring Harness Cost | 5 Pricing Factors
Custom car wiring harness costs hinge on 5 factors: materials (AWG 12-18 wires + tin-plated terminals add 30/unit), complexity (24+ circuits cost 40% more than 12-circuit), labor (150-50-$100), blending specs, labor, and scale.
Vehicle Model and Features
A 1975 Chevrolet C10 with a basic 350 V8 engine has a vastly simpler "nervous system" than a 2022 Ford F-150 with adaptive cruise control, lane-keeping assist, and a 12-speaker audio system. A modern vehicle can contain over 1,500 individual wires, totaling more than 1 mile (1.6 km) in length and comprising over 3,000 separate connections.
Cars built before 1980 often have straightforward electrical systems, sometimes with fewer than 20 circuits total. A custom harness for a classic car like a 1969 Mustang might only need to handle the ignition system, headlights, brake lights, and a simple radio. This simplicity keeps the average cost for a basic classic car harness between 1,200. In contrast, a vehicle produced after 2010 operates on complex computer networks, like a Controller Area Network (CAN bus). Integrating a custom harness with these systems is not just about connecting wires; it requires specialized knowledge to communicate with the 20 to 40 different electronic control modules (ECUs) that manage everything from the engine to the power windows. This integration can increase the design and labor time by 30-50% compared to a pre-1980s vehicle.
The trim level and optional features cause the most significant price variation within the same model. For example, a base model 2020 Toyota Tacoma without a premium audio package or sunroof will require a less complex harness than a TRD Pro version with a 400-watt JBL audio system, a panoramic moonroof, and multiple off-road lighting circuits. Each added feature introduces more wires, sensors, and control modules.
Integrating a premium audio system alone can add 500 to the harness cost due to the need for amplified speaker lines, noise-canceling circuitry, and subwoofer outputs. A sunroof module adds another circuit, and safety features like blind-spot monitoring require dedicated wires running to sensors in the rear bumper. The difference between a base model harness and a fully-loaded model harness for the same year vehicle can be 60-100% or more.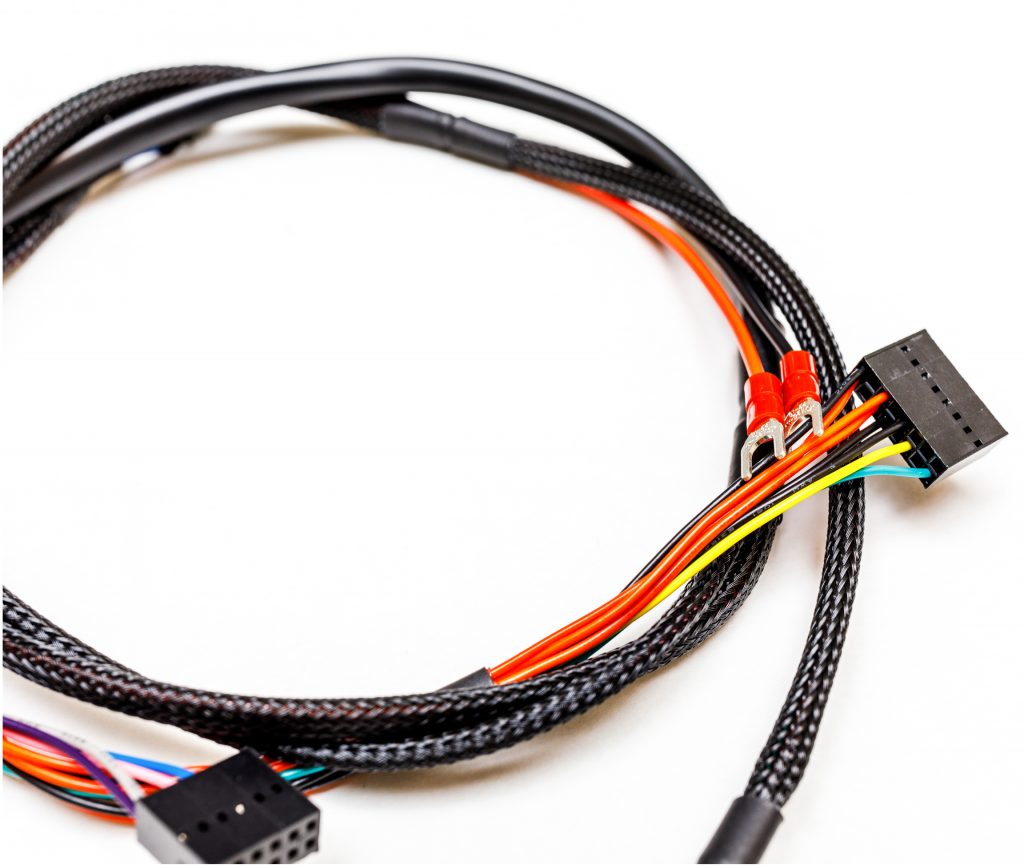
Wire and Connector Quality
The materials used in a custom wiring harness represent a direct trade-off between upfront cost and long-term reliability. While a basic harness might use standard materials costing , high-performance alternatives can exceed than a premium sealed version, can lead to a failure that requires 5-10 hours of labor (at $100/hour) to diagnose and repair. The choice between a GPT (General Purpose Thermoplastic) wire and a TXL (Thin Wall Cross-Linked) wire might seem minor, but TXL's thinner wall insulation allows for a 20-30% smaller diameter harness, better heat resistance (handling 257°F / 125°C continuously vs. GPT's 176°F / 80°C), and a longer service life of 15-20 years compared to 5-10 years for inferior grades.
The primary cost driver in wiring is the gauge (AWG) and construction of the copper conductor. For high-current applications like an amplifier power wire or a winch circuit, using 4 AWG wire instead of 8 AWG can double the material cost for that circuit, but it reduces voltage drop by approximately 75% over a 10-foot run at a 50-amp load, ensuring full power delivery. Oxygen-Free Copper (OFC) has a 99.95% purity level and offers 15-20% better conductivity than cheaper Copper-Clad Aluminum (CCA), which has a 61% lower conductivity and is prone to oxidation and brittleness over a 2-3 year period. The insulation material is equally critical. Cross-linked polyethylene (XLPE) insulation, common in TXL and SXL wires, can withstand under-hood temperatures exceeding 125°C (257°F), while standard PVC insulation may soften and crack at 85°C (185°F). This thermal durability is why high-quality wire often carries a SAE J-1128 specification, guaranteeing its performance under automotive stress, and can add a 25-40% premium over generic wire.
A unsealed, nylon connector with simple brass terminals might cost . The gold plating on terminals, typically 0.76 to 1.27 microns thick, provides a stable, low-resistance connection of less than 5 milliohms, which is essential for sensitive digital signals from sensors like crankshaft position or oxygen sensors. Sealed connectors use rubber grommets and seals that can withstand pressure spray and immersion to a depth of 1 meter for 30 minutes, preventing corrosion that causes over 60% of all electrical gremlins.
Labor and Installation Time
Labor is the single largest variable cost in a custom wiring harness project, often accounting for 50% to 65% of the final price. Shop rates typically range from 150 per hour, and the total installation time can vary from a manageable 8 hours for a simple classic car to a demanding 40+ hours for a complex modern vehicle. The process is not just plugging in a pre-made kit; it involves meticulous steps like completely removing the old, potentially brittle harness—a task that can take 2-3 hours alone in a cramped interior—and systematically routing hundreds of feet of new wiring through firewalls and along chassis rails. This extensive labor investment means that a 10% increase in installation complexity can directly translate to a 400 increase in the total cost, making understanding the time factors critical for budgeting.
A pre-1980s car with minimal electronics might require a straightforward 8-15 hours for a full custom harness installation. The technician can often follow a simple diagram, and connecting 15-20 circuits is a relatively linear process. In contrast, a modern car (post-2000) with a Controller Area Network (CAN bus) system turns the installation into a diagnostic-heavy integration project. The installer must ensure the new harness correctly interfaces with the 20-30 existing electronic control units (ECUs). This involves verifying digital communication signals, which operate at speeds like 500 kilobits per second, and ensuring no voltage drops exceed 0.5 volts on critical sensor circuits. This diagnostic and calibration phase can add 5-10 hours to the job, as a single fault code could require 2-3 hours of tracing with an oscilloscope to pinpoint a communication error on a single wire.
For example, integrating a custom harness with a modern body control module (BCM) requires meticulously pinning out each wire to match the vehicle's original configuration. A single mistake, like incorrectly assigning a wire for power windows that can draw 15-20 amps, can damage a module costing $800+.
A technician must carefully run the main wire bundle, which can be 2 inches (50 mm) in diameter and contain over 50 wires, from the engine bay through the vehicle's firewall—a task requiring precise drilling and the installation of a grommet to prevent abrasion. Securing the harness with P-clips or loom clamps every 12-18 inches (30-45 cm) along the frame is essential to prevent damage from vibration that can occur at frequencies from 10 to 200 Hz. Under the dashboard, the confined space increases the installation time by at least 30%, as the technician works overhead or in awkward positions to connect to the fuse panel, which may have 30-40 individual terminations. Each connection—stripping, crimping with a force of 1500-2000 newtons for a gas-tight seal, and heat-shrinking—takes an average of 2-3 minutes. For a harness with 200 connections, this alone represents 7-10 hours of focused labor.
Custom Features and Options
A project that includes even a few common upgrades can see a 60-100% cost increase compared to a simple replacement harness. The price fluctuates based on the current draw (amps), wire gauge (AWG), and control logic required for each feature. For instance, adding a single 30-amp circuit for a winch involves heavier 4 AWG wire and a high-current relay, while integrating an aftermarket ECU requires precise wiring for multiple sensors.
Common add-ons include:
- High-power audio amplifiers and subwoofers
- Off-road LED light bars and auxiliary lighting
- Electric cooling fans and fuel pumps
- Aftermarket ECU or gauge cluster integration
- Trailering harnesses with electric brake controllers
- Multiple 12V power outlets (cigarette lighter sockets)
| Custom Feature | Estimated Cost Impact (Parts & Labor) | Key Complexity Factors |
|---|---|---|
| Auxiliary Lighting (e.g., 20" LED Bar) | 400 | Requires a dedicated 30-40 amp relay circuit, switch integration, and 12-14 AWG wire run from the battery. |
| High-Power Audio System (1000W Amp/Sub) | 1,000+ | Needs a 4 AWG or 0 AWG power kit, RCA cables, remote turn-on wire, and speaker-level adapters. |
| Aftermarket ECU / Engine Management | 2,500+ | Most complex; involves wiring 20-30 sensors (TPS, MAP, CKP) and actuators (injectors, coils) with 22-18 AWG wire. |
| Electric Fan Controller (Dual Fans) | 350 | Adds a 40-60 amp relay circuit, temperature probes, and potentially a PWM controller for variable speed. |
Adding a set of 4 off-road lights drawing 15 amps each necessitates a primary power wire capable of handling a combined 60-amp load, which requires 10 AWG wire—thicker and more expensive than standard 16 AWG wiring. Each circuit needs a waterproof relay (≈10), and the install time increases by 1-2 hours for routing the wire through the firewall and mounting the switches. A high-performance audio system has an even greater impact. A 1000-watt RMS amplifier requires a 0 AWG or 4 AWG pure copper power cable, which can cost 8 per foot. You also need to run a dedicated 18 AWG remote turn-on wire and high-quality shielded RCA cables (80) to prevent alternator whine, which is a 3-5 hour installation process requiring the removal of interior trim panels.
Wiring an aftermarket ECU like a Haltech or MegaSquirt unit involves connecting to crankshaft position sensors that generate a precise 5-volt square wave signal and fuel injectors that pulse open for durations as short as 1.5 milliseconds. Each of the 4-8 injectors requires a separate driver circuit using 14 AWG wire, capable of handling 2-4 amps of peak current. The harness must be engineered with extreme precision, as a 0.5-volt signal drop on a 5-volt MAP sensor circuit can cause a 10% error in air-fuel ratio calculations.
Manufacturer and Supplier Choice
Your choice of supplier dictates the harness's fundamental design philosophy, material quality, and ultimately, its long-term reliability. This decision creates a price spectrum with a ±40% variance for what appears to be the same product. The cost difference is not arbitrary; it directly reflects the engineering time, component sourcing, and quality assurance protocols employed by the manufacturer. A harness from a volume producer is designed for the 80th percentile of a vehicle model, while a custom builder designs for your one specific vehicle, accounting for every factory option and planned modification, a process that adds 15-25 hours of dedicated engineering labor upfront.
| Supplier Type | Price Multiplier (vs. Basic Kit) | Key Differentiators |
|---|---|---|
| Online Mass-Producer (e.g., eBay/Amazon) | 0.7x - 0.9x (Lowest Cost) | Generic components, limited testing, often no technical support or warranty. |
| Established Kit Brand (e.g., Painless Wiring) | 1.0x (Baseline) | Good quality materials, clear instructions, standardized layouts for common applications. |
| Specialist Fabricator (Small Business/Solo) | 1.5x - 2.5x | High-grade materials, direct consultation, vehicle-specific tailoring, better warranty. |
| Top-Tier Motorsport/Restoration Shop | 3x - 5x+ | Aerospace-grade components, mil-spec connectors, full validation testing, lifetime support. |
The price difference between a 2,200 unit from a specialist like American Autowire or Ron Francis is rooted in component quality and design precision. The budget option often uses PVC insulation rated for 80°C (176°F) and copper-clad aluminum (CCA) conductors with 61% lower conductivity than pure copper. In contrast, a premium kit uses TXL or GXL cross-linked polyethylene insulation rated for 125°C (257°F), which can last the 15-year lifespan of the vehicle. The specialist harness will include fused relay boxes with IP67-rated seals and gold-plated terminals for critical sensors, reducing the chance of a voltage drop below 0.5 volts on a fuel pump circuit that could cause engine failure under load.
The most significant value of a specialist or custom shop lies in the engineering and validation process. A mass-produced kit ships a 200-page generic manual, leaving you to identify each of the 300 wires. A custom builder provides a vehicle-specific diagram where every wire is labeled, and the harness is pre-terminated to match the exact length required, reducing installation time by 10-15 hours. They perform a 100% continuity test on all 500+ possible pin-to-pin connections before shipment, a process taking 3-4 hours, ensuring a 99.9% defect-free product.
