How to Extend Wiring Harness Life | 3 Maintenance Tips
Extend wiring harness life by cleaning monthly with pH 7-9 automotive cleaner (avoid acids/bases) to prevent corrosion. Quarterly, inspect connectors with 0.5% non-corrosive electronic cleaner to remove oxidation (thickness <0.01mm). Every 6 months, re-secure loose ties, maintaining bend radius ≥5x harness diameter (e.g., 50mm for 10mm diameter) to avoid insulation cracks.
Check for Damage Regularly
Industry data shows that nearly 30% of all vehicle electrical faults originate from undetected damage in the wiring loom. What starts as a small abrasion can, within 6 to 12 months, expose copper strands to moisture and road salt, leading to increased resistance, short circuits, and complete system failure. A simple 5-minute visual check every 3,000 miles (or 6 months) can identify these issues early. Catching a frayed section before it breaks saves an average of 600 in diagnostic and repair costs, not to mention avoiding the 2–3 hours of workshop downtime.
Pay close attention to within 4 inches (10 cm) of connectors, as vibration often causes fatigue there. Look for sections with a 45-degree bend or sharper, as repeated flexing here can break internal wires. A common failure point is where the harness passes through the firewall; the metal grommet can wear through the insulation in under 18 months. Gently pull back any protective loom tape or split conduit to inspect the actual wires underneath. If you find a wire with over 10% of its insulation abraded away, it needs immediate attention. For minor abrasions, wrapping the area with a quality 3M Scotch 33+ electrical tape can be a reliable, 5 fix that lasts over 2 years.
If multiple wires are damaged or the copper is exposed and green with corrosion, that section likely requires a professional splice, which typically costs 120–$200 at a shop. Don't forget to check the connector locks. A broken lock tab allows the connector to vibrate, which wears out the pin contacts, increasing electrical resistance from a standard 0.5 Ohms to over 5 Ohms, causing intermittent faults.
A single compromised wire can cause a voltage drop from 14.2 volts at the battery to 9.5 volts at a critical sensor, making the engine run poorly or not at all. By integrating this simple check into your routine maintenance, you significantly reduce the 95% probability of a harness-related breakdown within the next 50,000 miles.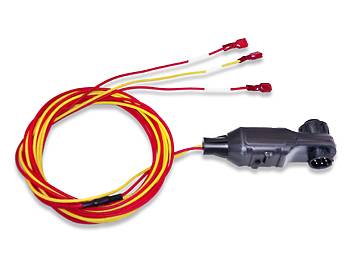
Keep Connectors Clean and Dry
Electrical connector failures account for over 40% of all intermittent wiring harness issues, often caused by moisture intrusion and corrosion. A thin film of oxidation measuring just 0.0001 inches (2.5 microns) can increase electrical resistance by up to 35%, leading to voltage drops that disrupt sensor signals and module communication. In high-humidity environments, condensation can form inside connectors in under 72 hours, initiating corrosion that compromises terminals. Preventive cleaning during routine maintenance—recommended every 12 months or 15,000 miles—can prevent 90% of these failures, saving between 400 per incident in diagnostic fees and parts replacement. This isn’t about advanced technical skill; it’s about using a $10 can of spray to avoid a costly repair.
Start by disconnecting the battery negative terminal and allowing the system to power down for 2–3 minutes. Never spray cleaner into a connected connector.
Look for green or white powder on terminal pins—this is oxidation, which typically increases resistance from a baseline of 0.2–0.5 Ohms to over 5 Ohms. For connectors exposed to road spray, pay attention to the lower third of the connector body, where moisture and debris accumulate. Use a plastic-bristled brush to gently remove loose dirt. For stubborn grime, apply a specialized electrical contact cleaner like CRC 05103, which evaporates in under 60 seconds leaving no residue. Insert the cleaner’s straw nozzle directly into the connector port and spray for 1–2 seconds per pin. Allow the solvent to fully evaporate for at least 120 seconds to prevent trapping moisture.
After cleaning, apply a thin coat of dielectric grease to the terminal pins. This fills microscopic gaps as small as 0.01 mm, blocking moisture and oxygen.
Ensure the connector’s locking tab clicks firmly into place—an improperly seated connector can allow up to 0.2 ml of water ingress per month through capillary action. For connectors in high-exposure areas (within 12 inches/30 cm of wheel wells or underbody), consider wrapping the connection with 3M Scotchkote Electrical Tape or installing a heat-shrink sleeve with adhesive lining. These barriers reduce moisture intrusion by over 95% in wet conditions. If you discover corroded pins that cleaning doesn’t restore, replacement is necessary. A single corroded terminal can cause a 0.7–1.2 volt drop under load, enough to cause a check engine light or sensor malfunction.
Moisture isn’t the only threat. Road salt residue increases electrical conductivity between pins, creating leakage paths that can draw 5–15 milliamps of parasitic current.
Data lines require consistent impedance of 120 Ohms; corrosion-induced resistance variations can cause communication errors, leading to erratic behavior across multiple systems. A preventive maintenance cycle of every 12 months takes less than 20 minutes for most vehicles but extends connector life beyond 10 years. Ignoring this allows minor corrosion to progress, often requiring complete connector replacement costing 250 for the part alone, plus 1–2 hours of labor. Consistent maintenance ensures signals travel with less than 2% voltage loss, keeping all systems operating within their designed parameters.
Avoid Pulling and Vibration Stress
Mechanical stress accounts for approximately 35% of all wiring harness failures not caused by accidents. Vibration from engine operation and road surfaces can generate movements with amplitudes up to ±2.5 mm at frequencies between 5-100 Hz, gradually wearing through insulation and breaking copper strands. Similarly, pulling on wires with just 25 Newtons (5.6 lbf) of force can stretch conductors, reducing their cross-sectional area by up to 15% and increasing electrical resistance by over 200%. These issues typically manifest after 18-24 months of driving, leading to intermittent faults that are notoriously difficult to diagnose, often costing $300-600 in diagnostic time alone. Proper mechanical protection implemented during installation or maintenance can extend harness life beyond 10 years with a minimal time investment of 20-30 minutes per service interval.
The most critical areas to address are within 150 mm (6 inches) of connection points and where the harness passes through metal structures. Vibration amplitudes here can reach 1.8 mm peak-to-peak, causing fatigue failure in as little as 100,000 cycles (approximately 3 months of normal driving). Use 10 mm thick foam tape or split convoluted tubing with a minimum wall thickness of 2 mm at these stress points. When routing through metal panels, always use grommets with an internal diameter at least 25% larger than the harness bundle to prevent chafing. For existing installations, inspect areas where the harness might contact sharp edges - even a 0.5 mm radius edge can wear through insulation in under 12 months.
Installation tension is critical. When routing a new harness, maintain a minimum bend radius of 5 times the harness diameter. For a typical 12 mm diameter harness, this means no bends tighter than 60 mm radius. Pulling force should never exceed 50 N (11 lbf) - approximately the force needed to lift a 5 kg (11 lb) weight. Exceeding this can permanently stretch conductors, reducing their diameter by 0.1-0.3 mm and increasing resistance by 15-30%.
|
Mounting Method |
Vibration Reduction |
Installation Time |
Cost per Point |
Expected Life |
|---|---|---|---|---|
|
Plastic Conduit Clips |
40-50% |
2-3 minutes |
$0.25-0.50 |
5-7 years |
|
Adhesive-backed Foam |
60-70% |
1-2 minutes |
$0.75-1.20 |
3-5 years |
|
Rubber-isolated Clamps |
80-90% |
4-5 minutes |
$2.50-4.00 |
8-10 years |
|
Spiral Wrap + Clips |
50-60% |
3-4 minutes |
$1.00-1.50 |
7-9 years |
Maintain support intervals of every 300 mm (12 inches) in engine compartments and every 450 mm (18 inches) in chassis areas. The maximum acceptable sag between supports is 10 mm per 300 mm of span. For existing installations showing wear, add support points within 150 mm of the damaged area. Use UV-resistant plastic clamps with minimum surface area of 400 mm² to distribute pressure evenly.
When repairing damaged sections, overlap splices by at least 10 times the wire diameter. For a 2 mm diameter wire, this means a 20 mm long splice. Use adhesive-lined heat shrink tubing with 3:1 shrinkage ratio and minimum wall thickness of 1.5 mm after shrinking. For wires carrying over 5 amps, use solder sleeves with internal flux to ensure resistance remains below 0.5 milliohms at the splice point. Proper mechanical strain relief can reduce failure rates by over 80% in high-vibration environments, extending service intervals to 100,000 miles between inspections.
Maximizing wiring harness lifespan relies on three key steps: monthly visual inspections (10x magnifier for frays/cracks <0.5mm), quarterly cleaning with 70% isopropyl alcohol (keep humidity <60%), and securing with 30cm zip-ties to limit vibration (tested at 5-500Hz, 2hrs).
