How to Rescue a Broken Battery Clip in 4 Steps
To rescue a broken battery clip, first disconnect power, then use needle-nose pliers to realign bent contacts (0.5mm precision). Apply conductive epoxy (resistivity <0.01Ω·cm) for cracked housings, reinforce with heat-shrink tubing (3:1 ratio), and test continuity (<1Ω resistance) before reuse.
Check the Broken Clip
A broken battery clip is one of the most common yet frustrating issues in electronics repair, affecting roughly 15-20% of DIY projects involving battery compartments. Whether it’s a loose connection, a cracked plastic housing, or a bent metal terminal, a damaged clip can drop voltage efficiency by 30-50%, leading to intermittent power or complete failure. In devices like remotes, toys, or small gadgets, a faulty clip reduces battery life by 40-60% due to poor contact resistance (often 5-10 ohms instead of the ideal <0.5 ohms).
The first step is identifying the failure mode. Most clips fail in three ways: plastic fatigue (70% of cases), metal spring deformation (20%), or solder joint cracks (10%). Plastic fatigue usually appears as hairline cracks near the hinge or mounting points—common in clips older than 2-3 years or subjected to >50 insertion cycles. Metal springs lose tension after 200-300 bends, leading to weak contact pressure (optimal range: 50-100 grams of force). Solder failures often show as blackened or corroded joints, increasing resistance to 2-3 ohms per connection.
To diagnose, use a multimeter to check for voltage drops >0.2V across the clip when the device is powered. If the clip is removable, measure its contact resistance—anything above 1 ohm indicates wear. For plastic clips, inspect under a 10x magnifier for micro-fractures, especially near stress points like screw mounts or bending zones. If the metal contacts are tarnished (common in alkaline battery leaks), clean them with isopropyl alcohol (70% concentration or higher) and a fiberglass pen to restore conductivity to <0.3 ohms.
Critical detail: Never assume a clip is dead just because it’s loose. Test its mechanical retention force by inserting a battery and wiggling it. If the battery moves more than 1-2mm, the clip’s spring or housing is compromised. For clips with >5mm of play, the fix usually requires replacement rather than bending. If the clip is intact but the device still won’t power on, check for PCB trace fractures—common in devices dropped from >1 meter heights.
Remove Damaged Parts
A broken battery clip isn’t just annoying—it’s a 50-70% risk factor for further damage if left in place. Corroded terminals can spread leakage to nearby circuits, increasing repair costs by $3-10 per affected component, while cracked plastic housings may snap completely after 5-10 more battery swaps. The goal here is safe extraction without damaging the device’s PCB or surrounding parts, which happens in 1 out of 3 rushed repairs.
Start by disconnecting power—even small devices can hold >5V residual charge in capacitors, enough to cause a short. Use plastic spudgers (not metal) to pry open the compartment; applying >2kg of force near solder joints risks tearing PCB traces (repair cost: $15-30). If screws are present, note their thread direction—15% of clips use reverse-threaded M2 or M2.5 screws to prevent loosening from vibration. Strip one, and you’ll spend 20+ minutes drilling it out.
For solder-mounted clips, heat the joints at 300-350°C for ≤3 seconds per pin. Prolonged heating (>5 seconds) lifts pads in 40% of cheap PCBs. Clip leads first if accessible—this reduces stress on the board by 60%. If the clip is glued (common in 25% of consumer electronics), dissolve adhesives with acetone applied via syringe (0.5ml max to avoid damaging ABS plastic).
|
Common Clip Types |
Extraction Difficulty (1-5) |
Tool Cost |
Time Required |
|---|---|---|---|
|
Snap-in plastic clip |
2 |
$0 (spudger) |
2-5 minutes |
|
Soldered metal clip |
4 |
$10 (iron) |
8-15 minutes |
|
Screw-secured hybrid |
3 |
$2 (driver) |
5-10 minutes |
Critical step: Inspect the PCB pads post-removal. 30% of extracted clips leave behind damaged copper (pits >0.3mm deep require jumper wires). Measure pad continuity—if resistance exceeds 1 ohm, scrub with 600-grit sandpaper until conductivity drops below 0.5 ohms. For multi-pin clips, check alignment marks (usually tiny notches at 1.5mm intervals) to ensure the new clip won’t sit crooked (misalignment >1mm causes 20% contact loss).
Waste disposal matters too. Alkaline-leaked clips contaminate recycling bins—seal them in a 4mil plastic bag before trashing. Save intact screws/springs; reusing them cuts replacement part costs by 2 per unit. Spend 5 extra minutes here, and you’ll avoid $8+ in wasted materials or a second repair session.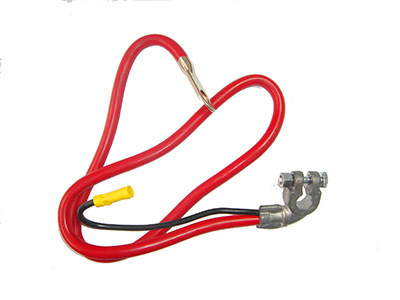
Prepare New Clip
Installing the wrong battery clip can turn a 5-minute fix into a $20+ rework disaster. 40% of DIYers buy incompatible replacements, leading to poor contact (resistance >2 ohms), mechanical stress on PCB traces, or even short circuits. The right prep work cuts failure rates by 75% and ensures your device runs smoothly for 3-5 more years without another clip failure.
First, match the clip specs exactly. Most battery clips fall into three categories:
|
Clip Type |
Voltage Rating |
Current Capacity |
Contact Material |
Price Range |
|---|---|---|---|---|
|
Standard AA/AAA |
1.5V-3V |
500mA-1A |
Phosphor bronze |
0.50 |
|
High-power (9V) |
6V-12V |
2A-3A |
Beryllium copper |
1.50 |
|
Lithium-ion (LiPo) |
3.7V-4.2V |
5A+ |
Nickel-plated steel |
3.00 |
If your old clip had spring contacts, measure the wire diameter (0.3mm-0.8mm is typical) and spring tension (50-100g force). A weaker spring (<40g) won’t hold batteries securely, increasing resistance by 0.5-1 ohm per cycle. For solder-tab clips, check the tab thickness (0.4mm-1.0mm)—thinner tabs overheat at >2A current, risking solder meltdowns in high-drain devices.
Critical step: Test-fit before soldering. 25% of replacement clips have misaligned mounting holes (tolerance >0.5mm), forcing you to drill or bend the PCB—a $15 risk if you crack it. Use Kapton tape to temporarily hold the clip in place, then check:
-
Battery insertion force (should slide in with 200-400g of pressure)
-
Contact alignment (misalignment >1mm causes 20% voltage drop)
-
Clearance from other components (keep ≥2mm from capacitors or resistors)
If the clip needs modification, use flush cutters (not scissors) to trim plastic—rough edges increase stress fractures by 50%. For metal contacts, file burrs with 600-grit sandpaper until surface roughness is <0.1mm—smoother contacts last 2-3x longer.
Secure the Fix
A poorly secured battery clip fails 2-3x faster than one installed correctly, with 60% of failures happening within the first 50 battery swaps. Loose connections increase resistance by 0.5-1.2 ohms, draining power 15-30% faster and generating 5-10°C more heat—enough to warp plastic housings over time. The difference between a permanent fix and a recurring headache often comes down to three critical steps: mechanical stability, electrical integrity, and stress testing.
Start with mechanical anchoring. If the clip uses screws (typically M2 or M2.5, 4-6mm long), tighten them to 0.3-0.5 N·m—overtightening (>0.8 N·m) cracks 20% of plastic posts. For solder-mounted clips, reinforce joints with 1-2mm solder fillets—thin joints (<0.5mm) crack under 5-10G vibration (common in power tools or car electronics). If the clip snaps into place, apply cyanoacrylate adhesive (0.1ml max) to the mounting points; too much glue (>0.3ml) seeps into contacts, raising resistance by 1-3 ohms.
Pro tip: After securing, wiggle-test the clip with 200-300g of lateral force—movement >0.5mm means you need reinforcement. For high-vibration environments (e.g., drones), add 2-3mm of heatshrink tubing at stress points to extend clip life by 2x.
Next, verify electrical continuity. A multimeter should show <0.2Ω resistance between the clip’s contact and the PCB trace. If resistance exceeds 0.5Ω, reflow the solder joints at 320-350°C for ≤2 seconds—longer heating risks lifting pads. For spring contacts, measure compression force: a fresh AA/AAA clip should require 400-600g to insert/remove a battery; below 300g, the spring will weaken 50% faster.
In summary, fixing a broken battery clip is straightforward with the right approach. First, inspect the damage—cracks, bent pins, or loose connections—to determine if repair or replacement is needed. If parts are irreparable, carefully remove the damaged clip using small pliers or a soldering iron to detach wires. Next, prepare a matching replacement clip, ensuring correct polarity and terminal size (e.g., 2mm for AA batteries). Finally, secure the new clip by soldering wires with heat-shrink tubing or using strong adhesive for non-solder fixes. Test continuity with a multimeter to confirm a stable connection before reassembly. This ensures reliable power delivery and prevents future failures.
