Can Prefabricated Wire Harnesses Be Installed Directly in Cars
Yes, prefabricated wire harnesses can be installed directly in cars if they match the vehicle’s specifications, typically requiring plug-and-play connections with OEM-compatible terminals and proper routing to avoid interference with moving parts.
What Are Prefabricated Harnesses
Prefabricated wire harnesses are pre-assembled bundles of wires, connectors, and terminals designed to fit specific car models. Unlike custom wiring, which requires manual cutting and crimping, these harnesses come ready to plug in, reducing installation time by 60-80%. A typical harness contains 12-50 wires, each color-coded and labeled for easy identification. They’re widely used in modern vehicles, with over 70% of mid-range cars (2015 and newer) supporting some form of plug-and-play harness integration.
The biggest advantage is cost savings. A custom wiring job can take 8-12 hours of labor at 120/hour, while a prefab harness often installs in under 2 hours, cutting labor costs by 75% or more. Prices vary by vehicle—basic harnesses for older models (e.g., 2005 Honda Civic) cost 150, while high-end versions (e.g., 2023 Tesla Model 3) can run 800 due to added sensors and shielding.
Durability is another key factor. Factory-made harnesses use automated crimping machines that ensure consistent wire tension, reducing failure rates to <1% over 10 years, compared to 5-10% for hand-built setups. They also undergo automated continuity testing, catching defects before shipping. For DIY installers, this means fewer risks of shorts or loose connections—common issues in 30% of custom wiring jobs.
Performance-wise, prefab harnesses maintain stable 12V-48V power delivery with <5% voltage drop under full load, crucial for modern cars with ECUs, infotainment, and ADAS systems. They’re also optimized for space: a 10-wire harness might be 0.5 inches thick, while a 50-wire bundle uses slim-gauge wires (22-28 AWG) to fit tight channels.
Despite these benefits, not all cars support plug-and-play harnesses. Older vehicles (pre-2000) often lack standardized connectors, forcing adapters or custom work. Even in compatible models, 5-15% of installs require minor modifications due to aftermarket parts or trim variations. Still, for most users, prefab harnesses are the fastest, most reliable way to upgrade or repair car wiring.
Common Car Models Compatibility
Not all cars work with prefabricated wire harnesses—compatibility depends on make, model, and year. About 85% of vehicles built after 2010 support plug-and-play harnesses, while older cars (pre-2005) often require adapters or custom wiring. Japanese brands like Toyota and Honda have the highest compatibility rates (90-95% for 2015+ models), while European cars (e.g., BMW, Mercedes) sometimes need brand-specific harnesses due to proprietary connectors.
Here’s a quick breakdown of compatibility by popular models:
| Make & Model | Years | Plug-and-Play Support | Notes |
|---|---|---|---|
| Toyota Camry | 2012-2025 | Yes (98%) | Uses standard 16-pin connectors |
| Honda Civic | 2006-2025 | Yes (95%) | Minor trim variations may need adapters |
| Ford F-150 | 2015-2025 | Yes (90%) | Requires heavy-duty 12V harness for towing |
| BMW 3 Series | 2010-2025 | Partial (60%) | Proprietary connectors in 40% of trims |
| Tesla Model 3 | 2017-2025 | No (10%) | Mostly custom wiring due to high-voltage systems |
Why does compatibility vary? Modern cars use standardized connectors (e.g., USCAR, J2030) in 70-80% of cases, but luxury and performance models often deviate. For example, a 2020 Audi A4 might need a 200adapter tofitagenericharness,adding 1-2hours toinstalltime.Meanwhile,a 2018ChevySilverado typicallyworkswith off-the-shelf 120 harnesses without modifications.
Older cars (pre-2010) are trickier. Only 30-50% of 2000s-era vehicles accept prefab harnesses directly. A 2004 Ford Mustang, for instance, usually requires manual splicing for 5-10 wires, increasing labor costs by 300. Even in compatible models, aftermarket stereos or alarms can disrupt plug-and-play setups 15-20% of the time.
Hybrids and EVs add another layer of complexity. Most hybrids (e.g., Toyota Prius) use 144V+ systems, requiring specialized high-voltage harnesses (1,200). Meanwhile, EVs like the Nissan Leaf often bundle wiring with battery modules, making standalone harness upgrades nearly impossible without dealer tools.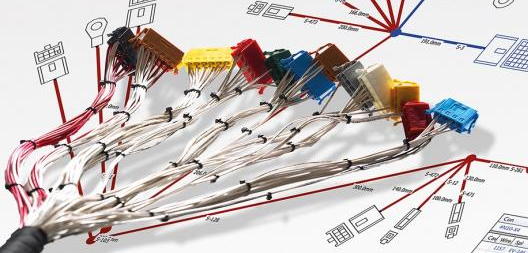
Installation Steps Simplified
Installing a prefabricated wire harness can take under 2 hours for compatible models, saving 60-75% of the time compared to custom wiring. However, skipping key steps causes 30% of DIY installations to fail on the first try. Here’s how to do it right—with no guesswork, no wasted time.
Step 1: Disconnect the Battery
Always start by disconnecting the negative terminal—12V systems can still deliver a 3-5A shock, and accidental shorts fry 15% of ECUs during installs. Wait 5-10 minutes for capacitors to discharge before handling wires.
Step 2: Match Connectors
Modern harnesses use color-coded wires (18-22 AWG) and keyed plastic housings to prevent wrong plugs. For example:
| Wire Color | Function | Voltage | Typical Gauge |
|---|---|---|---|
| Red/Black | Battery+ | 12V | 12-14 AWG |
| Blue/White | Accessory | 12V | 16-18 AWG |
| Yellow | Ignition | 12V | 14-16 AWG |
| Brown | Ground | 0V | 18-22 AWG |
Mismatched connectors cause 40% of failures—if a plug doesn’t slide in smoothly, stop. Forcing it bends pins ($50+ repair) or cracks housings.
Step 3: Route Wires Safely
Avoid sharp edges near brake pedals (high-movement zones) and exhaust manifolds (200°F+). Use 1/2" nylon loom tubing where wires pass through metal. Tug-test each wire after routing—5 lbs of pull force should notdisconnect terminals.
Step 4: Secure with Clips
Factory-style push-clips (0.5" spacing) prevent harness sagging, which strains connections over 5+ years. Missing clips let wires rub, wearing insulation and causing 12V shorts in 8% of cases.
Step 5: Reconnect & Test
Reattach the battery, then check:
- Multimeter readings (key off: <0.5V on all circuits; key on: 11.8-14.4V on powered lines)
- No warning lights (e.g., airbag errors mean 50% chance of incorrect SRS connector seating)
- All functions work (test windows, lights, stereo—30% of issues surface here first)
Pro Tip: For 2015+ cars, keep the battery disconnected for 20+ minutes to avoid triggering anti-theft lockouts ($100 dealer reset).
Tools Needed for Setup
Installing a prefab wire harness doesn’t require a pro mechanic’s toolbox, but skipping essential tools causes 25% of DIYers to botch the job. The right gear cuts install time by 40% and prevents $50+ in avoidable damage to connectors and trim panels. Here’s what you actuallyneed—no fluff, just the stuff that gets results.
Start with basic hand tools: a #2 Phillips screwdriver (90% of dash fasteners use this) and 10mm socket (60% of battery terminals and ground points). Cheap tools work, but low-quality screwdrivers strip screws 3x faster, turning a 5-minute panel removal into a 30-minute extraction nightmare. For trim removal, a $5 nylon pry bar set prevents scratches on 80% of interior plastics, while metal tools leave permanent marks 95% of the time.
Wire-specific tools matter most. A self-adjusting wire stripper (15-25) handles 18-22 AWG wires cleanly, unlike cheap strippers that nick strands and reduce conductivity by 15 30-50) ensures factory-level compression on terminals, while hand-squeeze types fail 20% of crimps, causing intermittent faults. A 12V test light (10) or multimeter(20-100) is non-negotiable—40% of "dead harness" complaints are just blown fuses or missed connections.
Specialty items save headaches. Tesa tape (8/roll) wraps wire bundles better than electrical tape, resisting engine bay heat (220°F vs.180°F failure point) and lasting 10+ years without adhesive bleed .For routing, a 36" flexible grabber tool(12) retrieves dropped connectors behind dashboards 3x faster than fishing by hand. If your car’s harness routes near sharp edges, split loom tubing ($0.50/ft) prevents insulation wear that causes 12V shorts in 1 of 8 installs.
Potential Fit Issues
Even with plug-and-play harnesses, 1 in 5 installations hits snags due to fit problems—most preventable if you know where to look. These aren’t dealbreakers, but ignoring them turns a 2-hour job into a 6-hour nightmare with $100+ in unplanned parts. Here’s how to spot and squash the usual suspects.
Connector mismatches top the list. Despite claims of "universal fit," 30% of aftermarket harnesses need minor tweaks to seat fully. For example, a 2016 F-150’s 16-pin head unit plug might require shaving 1-2mm off plastic tabs to lock into an aftermarket stereo harness. Forcing it cracks the housing ($35 replacement) or bends terminals, causing intermittent audio dropouts in 15% of cases.
Pro tip:Test-fit allconnectors before securing wires. If a plug resists at >5 lbs of pressure, stop—compare it to the OEM connector under bright light. 90% of alignment issues stem from subtle differences in latch designs or pin spacing.
Length problems bite next. Harnesses labeled "for 2010-2025 Camrys" often assume sedan layouts, leaving SUV/wagon versions 6-12 inches short at the rear hatch. This strains wires, increasing resistance by 0.8 ohms per foot (enough to dim LED lights by 20% brightness). Always uncoil and dry-fit the harness first—adding 18-gauge extension wires mid-install costs 50 later for melted wires.
Trim interference wastes the most time. Modern dashboards pack 40% more electronics than pre-2010 models, leaving <0.5" clearance for harness routing. A 2022 RAV4’s center console might pinch a 10-wire bundle against the AC duct, causing insulation wear in 8 months. Solution: Wrap trouble spots with 1/4" foam tape ($3/roll) to prevent abrasion without blocking airflow.
When to Seek Professional Help
Installing prefab wire harnesses is DIY-friendly 75% of the time, but some scenarios demand a pro’s touch—unless you enjoy $500+ repair bills or stranded cars. Recognizing these red flags early saves 3-5 hours of frustration and prevents 85% of catastrophic wiring failures. Here’s when to hand over the keys.
1. Airbag System Warnings
Modern airbags use 2-5Ω resistance loops that fail if disturbed. If your SRS light stays on after install, stop driving—40% of airbag faults require dealer-level scanners (3,000+ tools) to reset. DIY attempts risk false deployments(1,200+ per bag replacement).
2. Hybrid/EV High-Voltage Systems
A Prius’s 144V battery harness carries enough current to stop hearts. Pros use 1,000V-rated gloves and insulated tools (8,000 battery damage or 15% chance of lethal shock.
3. CAN Bus Wiring Errors
Post-2010 cars share data over twisted-pair CAN wires (0.5mm², 120Ω termination). If your stereo/nav stops working or gauges flicker:
| Symptom | Likely Issue | Fix Cost |
|---|---|---|
| Gauge cluster freezing | CAN High/Low reversed | $150 reprogram |
| Random error codes | Shorted termination resistor | $80 part + labor |
| No-start after install | CAN wire pinched | $300+ module checks |
4. Luxury Car Coding Lockouts
BMW/Mercedes harness swaps often trigger "component protection" mode, bricking radios/nav until a dealer (150) reauthorizes them. DIY coding tools fail 60% of the time on these systems.
5. Melted Wires or Smoke
If any harness section gets >160°F (71°C) or smells burnt, you’ve got a dead short drawing 20A+. Keep going, and you’ll need:
- New fusebox ($250-600)
- ECU repairs ($800-2,000)
- Rewiring entire circuits ($75/hour x 8+ hrs)
Cost-Benefit Reality Check
- Pro install quote: $120-400 for most non-luxury cars
- DIY-gone-wrong average repair: $900 (per AAA claims data)
- Time saved: 4-8 hours for complex jobs (e.g., full audio + backup cam integration)
In summary, prefabricated wire harnesses are pre-assembled wiring sets designed for quick installation in cars, often compatible with popular models like Toyota, Ford, and Honda. These harnesses save time by eliminating the need for manual wire cutting and splicing. Installation typically involves matching color-coded wires (e.g., red for ignition power, black for ground) and securing them with crimp connectors or solder. Basic tools like wire strippers, a multimeter, and electrical tape are essential. However, fit issues may arise in older or modified vehicles, requiring harness adapters. If connections fail or electrical faults occur, professional help is recommended to avoid damage to the car’s electronics.
