Professional Aptiv Connector Wire Harness Processing Guide | Automated Crimping, Assembly, Sealing
Professional Aptiv harness processing uses servo crimping machines (tolerance ±0.02mm, compatible with 0.13-6mm² wire sizes), vision positioning assembly stations (precision ±0.1mm, efficiency improved 40%), IP68-grade heat shrink + potting dual sealing, strictly controlling processes according to manual parameters to ensure connection reliability.
Automated Crimping
Aptiv connector automated crimping uses servo-driven equipment (e.g., Schleuniger/Komax models), precision ±0.03mm, efficiency 300-1200 cycles/hour (5x faster than manual).
Closed-loop system monitors pressure-displacement curve at 10kHz, intercepts defects such as burrs >0.05mm, insulation intrusion, achieving yield rate 99.95%.
Pull-off force ≥80N, cross-section fill ratio >90%, compliant with SAE/USCAR-21 automotive/industrial standards.
System Composition
Servo Crimping Machine:
For example, Schleuniger Crimpex 67 uses a 1.5kW servo motor with ball screw drive, capable of controlling pressure between 0-20kN in 10 steps.
During crimping, first pre-crimp (e.g., 4kN), then final crimp (8kN), the two-step force curve resembles a ramp.
Repeat positioning accuracy 0.01mm, meaning each crimp position varies by no more than 1/7th of a human hair diameter.
Komax Zeta 320 is more refined, capable of 3-step crimp (20% pre-crimp, 50% intermediate, 30% final), suitable for 0.64mm small terminals.
The body has an emergency stop button; if pressure exceeds limit (e.g., 22kN), power cuts off immediately to prevent die breakage.
Custom Dies:
For example, GT 150 series terminals, die made of tungsten carbide (WC-Co), hardness HRC 91, 10x more wear-resistant than ordinary steel, wears only 0.01mm after 500k crimps.
Designed using Aptiv's 3D drawings (e.g., DWG 1531234), die blade entry angle 45°, anvil curvature precisely fits terminal barrel inner wall.
Metri-Pack 280 terminal dies are more complex, must leave 0.1mm gap for burr evacuation, otherwise burrs can pierce insulation.
Nominal die life is 1 million cycles; actual use requires inspection of blade edge using a projector after 800k cycles.
Feeding System:
Vibratory bowl frequency set to 50Hz, terminals in hopper follow spiral track, orientation rate 99.5%.
Distance from hopper to crimping station 30cm, positioned within 3 seconds.
Reel feeder is more convenient, e.g., Schleuniger Feed 25 can handle 400mm diameter reels, feed speed 200 terminals/minute, tensioner maintains proper belt tension (±5%), prevents carrier tape breakage.
Wire processing module follows feeding: wire cutter uses tungsten carbide blades, replaced after 100k cuts, cuts 0.35mm² wire length ±0.2mm;
Strip depth set to 0.5mm, stripping exposes 8mm conductor, solder pot temperature 350±5°C, tin coating thickness 0.02mm.
Sensors:
Pressure sensor uses Banner Q45 strain gauge type, range 0-20kN, accuracy ±1% FS, 10kHz sampling rate.
If the curve fluctuates during crimping (e.g., wire slipping), system alarms immediately.
Displacement sensor is Keyence IL-300 laser type, resolution 10μm, measures ram travel; deviation exceeding 0.02mm from target 0.85mm stops the machine.
Vision sensor uses 5-megapixel camera, 30fps capturing terminals: orientation deviation 1°, missing pin can be detected.
Optional temperature sensor attached to crimping zone, alarms if exceeding 80°C for heat dissipation.
Standard Process
Program Loading:
Metri-Pack, Micro-Pack, GT series all included, each model has unique code (e.g., Micro-Pack 1.2 code 12048074).
Selecting code automatically calls preset parameters: crimp height 0.85mm, pre-crimp 4kN/0.3s, final crimp 8kN/0.5s, burr limit 0.05mm.
If current die set is for GT 150 but Metri-Pack 280 code selected, screen immediately shows red warning "Die set mismatch: Use DWG 1531234 die".
After confirmation, click "Load Program", machine self-checks 5 seconds (sensors, air pressure, voltage), green light indicates ready for feeding.
First Article Inspection:
Take a 0.5mm² wire (conductor 7 strands, each 0.26mm), cut to 8mm length per setting, strip to expose 8±0.2mm conductor, insert into terminal (e.g., Metri-Pack 280 white terminal).
After machine crimping, measure crimp height with Mitutoyo digital micrometer—take 1 point on each side of terminal barrel and 1 point in middle, calculate average.
Tolerance ±0.03mm, e.g., target 0.85mm, measured 0.82-0.88mm acceptable.
If out-of-tolerance, operator adjusts die set screw (0.01mm per turn), re-does first article until compliant.
After first article passes, system automatically saves as "Golden Sample", used for comparison every 100 pieces thereafter.
Wire Preparation:
Wire cutter is Komax Rotary Cutter, carbide blade, replaced after 100k cuts.
Cutting 0.35mm² wire, length set 120±0.2mm (e.g., Ford F-150 harness requirement);
Strip depth set 0.6mm, after stripping insulation remains 2mm, conductor exposed 8±0.5mm.
Timing is optional—high current terminals (e.g., GT 600 series) require timing, using ERSA preheating station, temperature 350±5°C, wire immersion 1.5 seconds, tin coating thickness 0.02±0.005mm (sampling checked with XRF thickness gauge).
Timed wires pass through air-cooling channel (air speed 5m/s), cool to room temperature within 30 seconds to prevent solder wicking.
Crimping Execution:
Terminal feeding uses vibratory bowl (frequency 50Hz), orientation rate 99.5%, misoriented terminals pushed back to hopper by deflector.
Wire inserted into terminal crimp barrel, robotic arm moves assembly to crimping station.
Crimping in two steps: Step 1 pre-crimp, servo motor applies 4kN force for 0.3 seconds, allowing conductor initial embedment into barrel (pressure curve rises smoothly);
Step 2 final crimp, force increases to 8kN, holds for 0.5 seconds, pressure curve steeply rises then stabilizes.
Entire force curve recorded by CrimpIQ, sampling rate 10kHz, saved as .csv file.
In-Process Quality Inspection:
Pressure sensor (Banner Q45, ±1% FS accuracy) monitors curve for fluctuations (e.g., wire slip causes sudden dip);
Displacement sensor (Keyence IL-300 laser, 10μm resolution) measures ram travel, stops if exceeding 0.85±0.02mm.
Vision system (Cognex In-Sight 8400, 5-megapixel) captures terminal image: orientation deviation 1°, bent pin, incomplete insertion (conductor extending >0.1mm beyond terminal) all considered NG.
Pressure curve real-time comparison with Golden Sample, deviation exceeding 5% (e.g., peak force changes from 8kN to 8.5kN) triggers alarm, next wire from that machine automatically flagged "Review".
Quality Control
Crimp Height:
Crimp height is a key quality metric, measured with Mitutoyo ID-C112B digital micrometer, accuracy ±0.001mm.
During operation, terminal barrel placed upward, micrometer anvil contacts both sides and center of barrel (avoiding burrs), measure each once and average.
E.g., Aptiv Metri-Pack 280 terminal target 0.85mm, tolerance ±0.03mm.
Sample 5 pieces hourly, verified with C-SAM 2000 gauge (non-contact optical measurement, error ±0.002mm).
If out-of-tolerance, operator adjusts die set screw (0.01mm per turn), re-does first article before resuming production.
Ford F-150 harness requires crimp height recorded in MES system, each wire corresponds to 1 data point for traceability.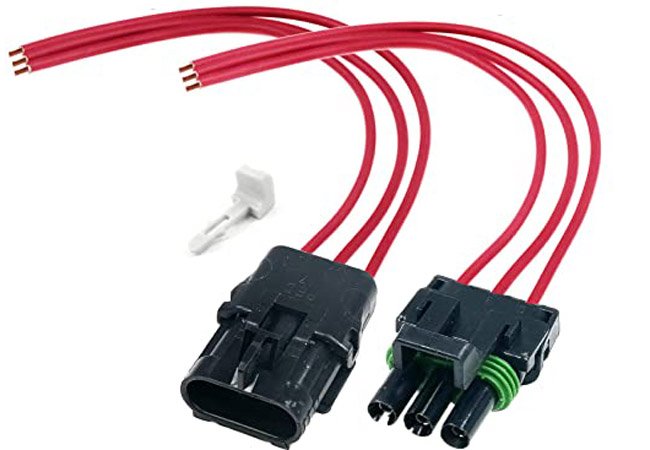
Cross-section Analysis:
Cross-section analysis examines conductor and terminal barrel bonding status, using Leica RM2265 manual microtome.
Steps: Cut crimp joint, embed in epoxy resin, cure 24 hours, slice 0.2mm thin section (blade speed 300rpm), observe under Zeiss Axio Imager D2 microscope at 100x magnification.
Focus on three points: conductor deformation ratio (7 copper strands should be compressed into one solid block, voids <5%), fill ratio (conductor cross-section area / terminal barrel area >90%), cracks/voids (200x magnification).
E.g., 0.5mm² wire with GT 150 terminal, fill ratio below 90% requires crimp height adjustment.
Pull-off Force:
During test, wire clamped vertically, pulled at constant speed 50mm/min until terminal detaches.
0.35mm² wire minimum pull-off force 80N (ASTM B913 standard), 0.5mm² requires 100N, 6mm² thick wire requires 250N.
E.g., GT 600 terminals crimped by Komax Zeta 320, recent 10 batches average pull-off force 92N, maximum 95N, minimum 89N (all above limit).
If a batch drops to 78N, system automatically locks equipment, checks for die wear or low pressure setting.
Visual Defects:
Visual inspection relies on Cognex In-Sight 8400 vision system, 5-megapixel camera + ring LED light (adjustable brightness).
After capturing crimp joint image, software automatically judges: terminal twist (allowable <2°, beyond is NG), burr height (edge detection algorithm, >0.05mm alarm), insulation crush (depth <0.1mm, excessive may cause short circuit).
E.g., Micro-Pack 1.2 terminals crimped by Schleuniger Crimpex 67, average burr 0.03mm, occasional 0.06mm ones pushed into scrap bin by pneumatic pusher.
Camera frame rate 30fps, each wire photographed twice (front + side), NG product images stored on server for engineer review.
Electrical Performance Sampling:
Resistance measured with Keysight 34461A multimeter, crimp joint resistance <5mΩ (wire itself ~3mΩ, total <8mΩ considered normal).
Insulation resistance measured with Fluke 1587 megohmmeter, apply 500V between terminal and wire insulation, reading >100MΩ.
Sampling rate 1%, e.g., monthly production 1 million terminals, test 1000 pieces monthly.
Tesla Model Y battery harness once returned due to high crimp resistance in a batch (7mΩ), investigation found excessive tin coating thickness (0.03mm exceeding 0.02mm standard), adjusted and resolved.
Equipment Calibration:
Micrometer calibrated monthly with gauge block (Mitutoyo 516-102, error ±0.002mm);
Pull tester calibrated quarterly at Instron factory, force error <0.5%; vision camera calibrated weekly with calibration target (checkerboard, accuracy 0.01mm).
Die wear also checked—projector (Nikon V-12B, 50x magnification) inspects die blade edge, chip >0.01mm requires replacement.
E.g., tungsten carbide dies used by Komax, nominal life 1 million cycles, actual replacement after 800k cycles, otherwise crimp height drifts 0.02mm.
Assembly
Environment control: anti-static work surface resistance 10⁶~10⁹Ω, humidity 45%~65% RH;
Use P/N TOOL-KIT-22G guide tool for terminal insertion, push CPA lock lever until CLICK sound;
0.35mm² wire bending radius ≥3×wire diameter, insertion force 8~12N;
Robot repeat positioning ≤0.05mm, insertion speed 20~50mm/s;
Conduction resistance <3mΩ (24AWG), withstand voltage AC 1500V/1min leakage <1mA, released per IATF 16949:2016.
Pre-Assembly Preparation
What specific things need to be done for environmental control?
Work surface uses metal substrate coated with conductive rubber, resistance must be stable between 10⁶~10⁹Ω.
Measure 3 points (left, center, right) daily before start using megohmmeter (P/N: MEGA-TEST-01, accuracy ±5%), record values.
Operators wear spring-type grounding wrist straps (P/N: WRIST-STRAP-02). Strap inner conductive fiber contacts skin, outer ground wire connects to workbench ground post.
Test resistance with wrist strap tester (P/N: TESTER-03) before each shift, must be <1MΩ to pass.
Temperature maintained 20~25°C using digital thermometer (P/N: THERM-04, accuracy ±0.5°C) placed at center of work area. Exceed limits activate HVAC.
Humidity 45%~65% RH monitored with digital hygrometer (P/N: HYGRO-05, accuracy ±2% RH).
Too dry (<45%) activate ultrasonic humidifier (output 300ml/h), too humid (>65%) activate dehumidifier (daily capacity 20L).
Hygrometer calibrated weekly with saturated salt solution (e.g., NaCl solution corresponding to 75% RH).
End of each shift, clean work surface, tool rack with 70% isopropyl alcohol (P/N: ALCOHOL-06) sprayed on lint-free cloth (Class 100 grade), focus on guide slots, crimp die residue.
Wall within 1m from floor covered with anti-static wallpaper (surface resistance 10⁸Ω), cleaned weekly with tacky roller.
What details are often missed during material verification?
Aptiv drawing numbers like TH/987654, physical label printed on connector housing side, includes model (e.g., MX23-16P), batch (YYWW, e.g., 2405), supplier code (SUP-APT-003).
Scan label QR code with scanner (P/N: SCAN-07), system automatically compares with drawing database. Mismatch halts material.
Silicone seals (P/N: SEAL-MX23-01) material is VMQ (Methyl Vinyl Silicone Rubber), hardness Shore A 40-60, measured with durometer (P/N: DURO-08).
Inner diameter tolerance ±0.1mm (e.g., nominal 5mm then 4.9~5.1mm), outer diameter ±0.2mm, measured with digital caliper (P/N: CALIPER-09, accuracy 0.01mm).
Inspect for tears, bubbles with 10x magnifier (P/N: LOUPE-10). Edge burr >0.05mm results in scrap.
Terminal insertion force pre-check per MS-810.
Use push-pull gauge (P/N: FORCE-TEST-05, accuracy ±0.5N) clamped to terminal tail, steadily push into empty connector (simulating insulator installed state).
0.35mm² terminal force 8~12N, 0.5mm² 12~18N. Out of range requires batch replacement.
Sample 5 pieces per batch, data recorded in "Terminal Pre-Check Form" (format: batch number, force 1-5, average, judgment).
Accessories also checked. Cable ties (P/N: TIE-100-50) width 1.0±0.1mm, length 50±2mm, tensile strength ≥50N (IEC 62275). Bend 180° by both ends, no cracks.
Heat shrink tubing (P/N: SHRINK-025) shrink ratio 2:1, nominal inner diameter 2.5mm, after shrinkage 1.2~1.3mm.
Test shrink with heat gun (P/N: HEATER-11, temp set 120°C), observe uniform adherence.
Tools and equipment must be calibrated first
Guide tool TOOL-KIT-22G (aluminum, weight 200g) has 2 locating pins per side, pin diameter φ2.0±0.05mm.
Check wear monthly with pin gauge (P/N: PIN-SET-12).
Terminal extractor EXTRACTOR-03 tip plastic sleeve thickness 2mm (prevents terminal plating scratch), spring force 15~20N.
Test quarterly with spring scale (P/N: SPRING-13).
Servo insertion mechanism (P/N: PRESS-14) nominal accuracy ±0.02mm.
Measure displacement monthly with laser interferometer (P/N: LASER-15), record X/Y axis deviation.
Pneumatic CPA locking device (P/N: CPA-PNEU-16) air pressure 0.4~0.6MPa.
Adjust daily before start with pressure gauge (P/N: GAUGE-17, accuracy 0.01MPa).
All tools labeled with calibration sticker (date, personnel ID, next calibration date).
Electronic records stored in MES system, path: Assembly/ToolCalibration/YYYYMM.
Assembly Process
Terminal insertion follows these steps
Use Aptiv designated wire stripper (P/N: STRIP-01, blade life 5000 cycles) to strip insulation.
0.35mm² wire strip 7±0.5mm, 0.5mm² strip 9±0.5mm. After stripping, check tail for insulation residue with 10x magnifier (P/N: LOUPE-10).
Terminal crimping uses die (P/N: CRIMP-22G, ceramic coating). Crimp force per MS-810 standard: 0.35mm² terminal 12±1kN, 0.5mm² 15±1kN. After crimping, test pull-off force ≥110N (IEC 60512-13-5).
Insert terminal using guide tool (P/N: TOOL-KIT-22G), aluminum body with 2 φ2.0±0.05mm locating pins.
Align terminal tail with tool slot, TPA (Terminal Position Assurance) lock tab facing unlock button direction, steadily push into connector cavity.
Insertion force measured with push-pull gauge (P/N: FORCE-TEST-05, accuracy ±0.5N): 0.35mm² terminal 8~12N, 0.5mm² 12~18N. Out of range indicates terminal deformation or cavity blockage.
After insertion, gently pull terminal tail, retention force ≥50N passes. Loose terminal removed with extractor (P/N: EXTRACTOR-03, spring force 15~20N) and re-inserted.
How to arrange multi-core wire sequence without confusion?
Follow Aptiv Color Code system. Wire colors fixed by function: red = power (+), black = ground (GND), blue = signal (CAN/LIN), yellow = high-speed signal (Ethernet).
Use wire sequencing fixture (P/N: JIG-SEQ-01, with elastic slots) to secure harness.
Fixture holes labeled Pin numbers (e.g., Pin1=red, Pin2=black), prevents crossing.
Multi-core wire bend radius strictly enforced: 0.35mm² wire ≥3×wire diameter (≈1.05mm), 0.5mm² ≥4×wire diameter (≈2mm).
Use bending fixture (P/N: BEND-02) assistance. After bending, no insulation cracking.
After wire sequence assembly, use short circuit test probe (P/N: SHORT-CHECK-03) to scan all pins, confirm no shorts (resistance >10MΩ).
Is the secondary lock mechanism properly installed?
Use pneumatic tool (P/N: CPA-PNEU-16, air pressure 0.4~0.6MPa) to press lock lever. Travel 3±0.5mm.
After hearing "CLICK" sound, use feeler gauge (P/N: FEELER-02, thickness 0.1mm) to measure gap between lock lever and housing—<0.1mm indicates proper engagement.
If no sound or large gap, check lock lever spring (P/N: SPRING-CPA-04) for fatigue (free length 10mm, compressed ≥8mm).
TPA (Terminal Position Assurance) latch also checked. Gently probe terminal with tweezers; TPA latch should engage terminal shoulder, no looseness.
MX25 series connector TPA has color indicator (green = locked, red = unlocked). After assembly, check color turns green.
What extra attention for waterproof connectors?
IP67 seal (silicone ring P/N: SEAL-MX23-IP67) requires silicone grease (P/N: GREASE-04, thickness 0.1mm) before assembly.
Press in using three-point insertion fixture (P/N: PRESS-SEAL-05).
Compression ratio 20±2% (e.g., ring thickness 5mm, after compression 4.0~4.1mm).
After assembly, perform air leak test: pressurize with 0.3bar compressed air, immerse in water 30 seconds, no bubbles acceptable (using leak tester P/N: LEAK-06, leak rate <1×10⁻³ mbar·L/s).
Blind-mate connectors (e.g., MX28 series) have guide posts (P/N: GUIDE-07, φ3.0mm).
Insertion resistance ≤15N, measured with push-pull gauge. After assembly, shake connector, axial movement <0.5mm.
What to check manually after robot insertion?
Automated line (annual output >500k pieces) uses robot (P/N: ROBOT-APT-08, repeat positioning ≤0.05mm) for terminal insertion, but manual supplementary inspection required:
-
Measure terminal height with laser thickness gauge (P/N: LASER-TH-09), tolerance ±0.1mm (e.g., nominal 2.5mm, allowed 2.4~2.6mm);
-
Inspect connector interior for terminal tilt, foreign material (debris >0.1mm requires cleaning) using borescope (P/N: ENDO-10);
-
Randomly sample 5 pieces for vibration test: vibration table (P/N: SHAKE-11) set amplitude 0.5mm@50Hz, 30 minutes later measure contact resistance <3mΩ (24AWG).
Differences between different connector models
-
MX23 series: Terminal tail has barb; after insertion, barb locks into insulator. Check barb expansion using fixture (P/N: HOOK-CHECK-12) (expansion angle ≥30°).
-
MX25 series: CPA lock lever has indicator window (white = unlocked, green = locked). After assembly, verify window turns green.
-
MX28 high-speed series: Terminal pitch 0.64mm. Inspect adjacent terminals for solder bridging (solder debris >0.05mm leads to scrap) using microscope (P/N: MICRO-13, 50x).
Assembly Technology
How is the robotic assembly line built?
Main line consists of 6-axis robot (P/N: ROBOT-APT-08, repeat positioning accuracy ≤0.05mm), vision positioning system (P/N: CAM-VIS-02, resolution 0.01mm/pixel), servo insertion mechanism (P/N: PRESS-SERVO-03, travel accuracy ±0.02mm), pneumatic CPA locking device (P/N: CPA-PNEU-16, air pressure 0.4~0.6MPa).
Vision system first captures connector cavity positions, uses Pattern Matching algorithm to locate datum points (e.g., three locating holes on housing), error >0.03mm triggers alarm.
Robot arm end equipped with quick-change fixture (P/N: QCK-CHG-04), switches MX23/MX25/MX28 connector fixtures within 30 seconds during model changeover.
Insertion mechanism has force feedback sensor (P/N: FORCE-FB-05, accuracy ±0.5N), adjusts pressure in real-time to prevent terminal deformation.
How strictly must insertion force/speed be controlled?
0.35mm² terminal: Insertion force 12±1kN, speed 20~30mm/s, insertion depth 3.2±0.1mm (verified with laser thickness gauge P/N: LASER-TH-09);
0.5mm² terminal: Force 15±1kN, speed 30~50mm/s, depth 4.0±0.1mm.
After insertion, terminal height tolerance ±0.1mm (e.g., nominal 2.5mm, allowed 2.4~2.6mm).
Out-of-tolerance adjust die position with fine adjustment screw (P/N: ADJ-SCRW-06).
Prevention of plastic deformation: Apply thin layer of lubricant (P/N: GREASE-07, thickness 0.05mm) on terminal front before insertion; after insertion, wait 5 seconds before moving robot arm.
Every 500 insertions, calibrate insertion depth with gauge block (P/N: STD-BLK-08), data recorded in "Insertion Calibration Log".
What if seal is improperly installed and leaks?
IP67 sealing uses silicone ring (P/N: SEAL-MX23-IP67, hardness Shore A 50±5).
Apply silicone grease (P/N: GREASE-04, thickness 0.1mm) before installation.
Three-point insertion fixture (P/N: PRESS-SEAL-05, pusher diameter φ3mm) applies uniform pressure.
Compression ratio 20±2% (e.g., ring thickness 5mm, after compression 4.0~4.1mm).
Air leak test uses LEAK-06 instrument, pressurize with 0.3bar compressed air, leak rate <1×10⁻³ mbar·L/s passes.
Blind-mate connector (MX28) guide post (P/N: GUIDE-07, φ3.0mm) insertion resistance ≤15N.
Measure with push-pull gauge (P/N: FORCE-TEST-05).
High-speed terminals with small pitch prone to solder bridging
MX28 high-speed series terminal pitch 0.64mm. Inspect adjacent terminals with 50x microscope (P/N: MICRO-13).
Solder bridging criteria: solder debris >0.05mm or bridging resistance <10kΩ.
Before assembly, dip terminal tail in flux (P/N: FLUX-09, silver content 0.5%), solder wire using heat gun (P/N: HEATER-11, temperature 280±10°C).
Solder joint diameter ≤1.5×wire diameter.
Use elastic slot plate fixture (P/N: SLOT-JIG-10) to secure terminals preventing movement. Slot width 0.1mm wider than terminal (e.g., terminal width 0.6mm, slot 0.7mm).
What tool to extract misaligned terminals?
After robot insertion, manual inspection inside connector using borescope (P/N: ENDO-10, probe diameter φ2mm).
Terminal tilt criteria: angle >2° from reference line. Use tweezers (P/N: TWEEZER-11, tip radius 0.1mm) to gently nudge tail back into position.
After repositioning, measure insertion force. If still exceeds 18N (for 0.5mm²), replace terminal.
Terminal extractor EXTRACTOR-03 (spring force 15~20N) used only for misassembled terminals. Tip has silicone pad (2mm thick) to prevent plating scratch.
After every 10 extractions, check extractor spring elongation (free length 20mm, compressed ≥16mm). If shorter, replace spring (P/N: SPRING-EXT-12).
Technical differences between connector models
-
MX23: Terminal has barb. Use HOOK-CHECK-12 fixture to verify barb expansion (expansion angle ≥30°). If not expanded, use ejector pin (P/N: PUNCH-13) to push barb root.
-
MX25: CPA lock lever has indicator window (white = unlocked, green = locked). After assembly, tap lever and listen for sound (2kHz frequency indicates true CLICK). No sound indicates check spring SPRING-CPA-04 (free length 10mm, compressed ≥8mm).
-
MX28 high-speed: Shield uses braid (coverage ≥85%). Ground terminal crimp force 18±1kN. Measure ground resistance <5mΩ using shield tester (P/N: SHIELD-TEST-14).
Defects missed by machines after assembly
Manual supplementary inspection items:
-
Use short circuit test probe SHORT-CHECK-03 to scan all pins, resistance >10MΩ (prevent short);
-
Randomly sample 5 pieces for vibration test (SHAKE-11 table, 0.5mm@50Hz, 30 minutes), measure contact resistance <3mΩ (24AWG);
-
Shake connector, axial movement <0.5mm (measured with dial indicator P/N: DIAL-15).
Sealing
Aptiv high-precision harnesses need to maintain IP68 protection rating under extreme temperature variations from -40℃ to 150℃, 95%RH high humidity, and ethylene glycol coolant erosion, with sealing process directly determining over 10-year service life.
Current production line data shows automated sealing equipment yield rate reaches 99.2%, an 18% improvement over manual operation.
However, heat shrink tubing shrinkage rate deviation >5% or potting compound bubble rate >0.3% can still lead to moisture vapor transmission rate exceeding standards.
Sealing Goals
Block water and dust, prevent internal part corrosion and short circuits
When Aptiv connectors are used in engine compartments, they must pass IP67 test: immersion in 1 meter water for 30 minutes, no water ingress inside;
For precision applications like onboard cameras, IP68 is required—immersion in 2 meter water for 60 minutes, or withstand high-pressure water jet wash (ISO 20653 standard).
Unsealed harnesses exposed to 95% humidity for 3 months will show terminal surface oxidation.
TE Connectivity conducted accelerated testing: unsealed connectors immersed in simulated rainwater solution (pH 6.5, containing 0.1% salt).
After 2 weeks, contact resistance increased from 5 mΩ to 20 mΩ, signal transmission delay increased by 15%.
Properly sealed harnesses under same conditions showed contact resistance change of only 0.5 mΩ.
Quantitatively, Aptiv requires post-sealing moisture vapor transmission rate below 1×10⁻⁶ g/cm²·day (measured with MOCON permeation tester).
Production line data from a North American Tier 1 supplier shows heat shrink sealing average moisture vapor transmission rate 0.3×10⁻⁶, potting compound can achieve 0.1×10⁻⁶, both 10x stricter than standard.
Withstand temperature changes, material should not deform or crack
Aptiv connector operating temperatures involve two scenarios: in engine compartment, summer up to 150℃ (near exhaust pipe), winter cold start -40℃; under chassis, summer up to 125℃, winter -55℃.
Sealing material must expand and contract with wires and connectors, otherwise cracking occurs.
Irradiated polyolefin (XLPO) heat shrink tubing linear thermal expansion coefficient is 1.5×10⁻⁴/℃, nearly 10x different from copper wire (1.7×10⁻⁵/℃).
Aptiv lab performed 1000 thermal cycles test.
Unsealed wire insulation swells; after sealing, heat shrink can "contain" the expansion difference, material tensile strength only decreases 5%.
Potting compound is more demanding. Two-component epoxy glass transition temperature (Tg) must be above 125℃.
If Tg is only 80℃, the compound softens under summer high temperature, causing gaps in sealing layer.
Henkel test report shows potting compound with Tg 130℃ placed at 150℃ for 1000 hours, hardness maintained 90% (Shore D hardness dropped from 75 to 67), while compound with Tg 80℃ dropped to 50%.
Resist chemicals, not corroded by oils/fluids
Aptiv sealing specification clearly states:
-
Engine oil: Per ASTM D471, immersion in 100℃ oil for 70 hours, weight change not exceeding 5%;
-
Coolant: 50% ethylene glycol solution (SAE J1034), immersion at 85℃ for 300 hours, volume expansion <3%;
-
Transmission fluid: DEXRON VI standard oil, immersion at 120℃ for 168 hours, hardness change <10%.
TE Connectivity compared ordinary PVC heat shrink tubing with Aptiv-certified XLPO: PVC became brittle after 72 hours in coolant, tensile strength dropped from 10 MPa to 3 MPa;
XLPO after 1000 hours still had tensile strength of 9 MPa.
Potting compound difference more pronounced: polyurethane compound after 500 hours in oil showed swelling cracks, while Aptiv-specified modified epoxy compound swelling rate only 0.8%.
Buffer vibration and shock, protect fragile connection points
SAE J2236 standard specifies vibration frequency 5-2000Hz, acceleration 20G (equivalent to 2kg object impacting 1 cm² area), 8 hours daily.
Aptiv measured with laser displacement sensor: unsealed harness after 100 hours vibration, terminal displacement inside connector reached 0.3mm, contact points repeatedly rub, plating wears off;
After sealing (heat shrink + potting dual sealing), displacement reduced below 0.05mm.
Contact resistance change also evident: before vibration 5 mΩ, after 100 hours vibration, unsealed increased to 25 mΩ, well-sealed only increased to 6 mΩ.
Road test data from a German automaker even harsher: after 1000 km on Nürburgring track (continuous vibration), terminal detachment rate for unsealed harness 12%, sealed harness 0.3%.
How is "meeting sealing goals" quantified?
Aptiv process manual lists 5 quantitative metrics:
-
Moisture vapor transmission rate <1×10⁻⁶ g/cm²·day (MOCON instrument measurement);
-
After 1000 thermal cycles (-40℃~150℃), sealing layer no cracks (50x microscope inspection);
-
After chemical immersion, tensile strength retention >85% (ISO 527-2);
-
After vibration test, terminal displacement <0.1mm (laser displacement sensor);
-
After 10-year aging, contact resistance change <20% (SAE J1211 accelerated aging equivalent).
Sealing Methods
Heat Shrink Sealing:
Aptiv application note (PN 112233) clearly states this method suits direct-plug connectors (e.g., Metri-Pack 280 series), where tail exposure length is 5-50mm.
Material must be correct
Must use Aptiv-certified irradiated polyolefin (XLPO) heat shrink tubing, not ordinary PVC tubing.
XLPO undergoes electron beam irradiation cross-linking, molecular structure more stable, shrink ratio fixed 3:1 or 4:1. Specific specifications based on wire diameter:
-
Wire 0.35-1.0mm²: Use Φ2.4mm heat shrink (post-shrink inner diameter 0.8-1.2mm)
-
Wire 2.5-6.0mm²: Use Φ6.4mm heat shrink (post-shrink inner diameter 1.6-2.4mm)
TE Connectivity tested: non-certified heat shrink tubing shrinkage deviation up to 10%, sealed moisture vapor transmission rate exceeds standard 3x (reaching 3×10⁻⁶ g/cm²·day).
Process parameters strictly controlled
Heating temperature and time are hard metrics:
-
Temperature: 120-180℃ (UL 224 certification range), monitor with Fluke temperature gun real-time, error ±2℃
-
Time: Cover entire sealing area (connector tail + heat shrink overlap 10-15mm), move heat gun uniformly (5 cm per second), extra heating 2 seconds at bends (prevent bubbles)
Schleuniger AutoShrink equipment data shows machine heating shrinkage deviation <2%, manual heat gun achieves 8% at best.
Equipment and efficiency
A North American harness factory using this equipment increased yield from manual 81.2% to 99.2%, reducing 2 workers per shift.
Potting Sealing:
Aptiv recommends for latch-type connectors (e.g., Superseal 1.5 series) and high vibration areas (near chassis suspension), where heat shrink may loosen.
Compound formulation matters
Use two-component epoxy or polyurethane compound, must meet:
-
Viscosity <500 cps (ISO 2555 standard, flows like water), too viscous won't fill narrow gaps
-
Mix ratio A:B = 1:1 or 2:1 (±1% error). Henkel EP 2345 compound datasheet states 1% ratio error changes cure time from 24 hours to 36 hours
-
Low shrinkage (<0.5%), prevents compound layer cracking after cure (Aptiv tests show 0.8% shrinkage compound resulted in 5% crack rate after 1000 hours aging)
Process steps detail focus
-
Mixing: Use static mixer (prevents bubbles), mixing speed 800 rpm (too fast entraps air)
-
Degassing: Vacuum ≤-0.09 MPa (DeKra vacuum pump), 15 minutes, bubble rate reduces from 5% to below 0.3%
-
Potting: Slowly inject compound from connector tail port (speed 2 ml/second), after filling let sit 10 minutes (allows compound to flow into micro gaps)
-
Curing: Place in 25℃ constant temperature oven for 24 hours (ASTM D3418 standard). Raising temperature to 35℃ shortens to 12 hours, but Tg (glass transition temperature) drops from 130℃ to 115℃, prone to softening at high temperature
Field data
A German Tier 1 factory uses Henkel Potting Robot, potting amount per harness error <0.1 ml, after curing hardness Shore D75 (cannot be pressed by hand), after 100-hour vibration test (SAE J2236), compound layer showed no cracks.
How to choose between the two methods?
| Comparison Item | Heat Shrink Sealing | Potting Sealing |
|---|---|---|
| Suitable Connectors | Direct plug type (tail exposed 5-50mm) | Latch type (with potting port) |
| Cost | Material cheap ($0.1/pc), equipment expensive ($50k) | Material expensive ($0.5/pc), equipment moderate ($30k) |
| Process Time | 12 seconds/pc (automated) | 30 seconds/pc (including curing wait) |
| Long-term Performance | Shrinkage retention 90% after 10-year aging | Hardness retention 85% after 10-year aging |
| Repair Difficulty | Cut heat shrink tube to remove | Need to scrape compound, may damage terminal |
Special circumstances:
Some extreme scenarios (e.g., engine bay high temperature + high vibration) allow "heat shrink + potting compound" dual sealing.
First apply heat shrink tube on tail (shrinks and fixes), then pot small amount of compound into gap between tube and connector (prevents vibration loosening).
Ford F-150 pickup harness uses this method, road test 100k km later, sealing failure rate 0.
Automated Process Efficiency
Where exactly does automation save?
For example, heat shrink tube heating: manual heat gun distance varies easily, causing uneven shrinkage;
Potting: shaky hands cause over/under application, plus cleaning overflow.
Automated equipment standardizes these actions, replacing hands with robotic arms and sensors.
Take heat shrink sealing as example:
-
Time: Manual tube placement + heating + inspection takes 45 seconds per harness (North American harness factory labor statistics); automatic heat shrink machine (e.g., Schleuniger AutoShrink) completes "tube feeding - positioning - heating - cooling" in one clamping cycle, cycle time 12 seconds, over 3x faster.
-
Error: Manual heating heat shrink shrinkage deviation up to 8% (tube not tightly adhered in some areas); machine uses temperature control module (error ±2℃) + vision positioning (aligning to connector tail error <0.5mm), shrinkage deviation <2% (Aptiv lab data).
-
Yield rate: Manual operation affected by fatigue, a North American factory manual sealing yield 81.2%; after using automated machine, yield increased to 99.2% (20 fewer harnesses reworked per shift).
Efficiency difference between automation levels
Semi-automatic:
A German Tier 1 factory used this solution: potting time 30 seconds/pc (15 seconds faster than manual), but compound amount error ±0.3 ml (manual ±0.5 ml), bubble rate still 3% (machine degassing incomplete), yield 89%.
Fully automatic:
Henkel Potting Robot is typical, with 3D vision recognizing connector model, automatically adjusting potting nozzle position, compound mix ratio (A:B=1:1) controlled by servo motor (error ±0.5%), integrated vacuum pump degassing (≤-0.09 MPa for 15 minutes). Data comparison:
-
Potting amount error <0.1 ml (1/3 of semi-auto)
-
Bubble rate 0.2% (1/15 of semi-auto)
-
Cycle time 25 seconds/pc (including curing wait, semi-auto requires 40 seconds)
Where does the data behind equipment come from?
Cycle time: Recorded using stopwatch averaging 100 consecutive operations. E.g., Schleuniger AutoShrink, heating stage 8 seconds (120-180℃ uniform movement), cooling stage 4 seconds (air cooling to set), total 12 seconds. Machine logs production reports (output 360 pcs per shift).
Positioning error: Measured with laser displacement sensor. Machine vision system captures connector tail image, calculates offset. North American factory actual measurement <0.5mm (manual with ruler ±2mm).
Consistency: Measure shrinkage rate of 100 tubes. Automatic machine tubes, post-shrink inner diameter deviation <0.1mm (e.g., nominal 3mm, actual 2.9-3.1mm); manual tubes deviation 0.3mm (2.7-3.3mm), post-sealing moisture vapor transmission rate differs by 2x (auto 0.3×10⁻⁶ vs manual 0.6×10⁻⁶ g/cm²·day).
Automation solutions used in factories
Small batch, high variety:
E.g., US Lear Corporation engine harness line needs to cut 3 types heat shrink tubes (Φ2.4/6.4/12.7mm), uses Schleuniger modular heat shrink unit.
Changing type only adjusts parameters (5 minutes), no hardware change.
Data: Efficiency loss after changeover <5%, saves $30k compared to buying 3 dedicated machines.
High volume, single type:
German Leoni electric vehicle harness line, daily output 5000 pcs, uses "automatic threading machine + AutoShrink + Potting Robot" complete line.
From wire cutting to sealing completion, fully automated, only 2 workers per shift for monitoring (manual line requires 8).
Cost: Equipment investment $250k, saves $180k labor annually (assuming $60k per worker annually), 2-year payback.
