Reducing errors in Cable Harness assembly | 4 ways
To minimize errors in cable harness assembly, implement automated testing (reducing defects by 30%) and use color-coded wiring diagrams (cutting mistakes by 25%). Ensure proper training (improving accuracy by 40%) and adopt barcode scanning for component verification (error rates drop by 50%). Regularly audit workflows to maintain consistency.
Check Wire Length First
Wire length is one of the most common sources of errors in cable harness assembly. A mismatch of just 5-10mm can cause tension, poor connections, or even complete failure in high-vibration environments. Studies show that 23% of harness defects in automotive and aerospace applications stem from incorrect wire lengths, leading to 15-30% longer assembly times due to rework. In industrial automation, improperly cut wires increase failure rates by 12% within the first 6 months of operation.
The key is precision. If a wire is too short, it strains the connector, reducing its lifespan by up to 40%. If too long, excess wire creates clutter, increasing the risk of shorts by 18% in tightly packed panels. The ideal approach is to measure twice, cut once—using calibrated tools like laser measurement devices (±0.5mm accuracy) or automated cutting machines (error rate <0.3%). For manual processes, a simple length template (marked in 10mm increments) reduces mistakes by 65% compared to freehand cutting.
High-volume manufacturers save 0.12 per harness by optimizing wire length early—adding up to 50,000 annually for operations producing 400,000+ units/year. In contrast, fixing a mis-cut wire post-assembly costs 3-5x more in labor and materials. For example, replacing a single 2-meter power cable in an industrial control panel takes 8-12 minutes, whereas getting it right the first time takes under 2 minutes.
Best practices include:
- Pre-cutting wires in batches (reduces variability by 22%)
- Using adjustable jigs (cuts errors by 30% vs. manual marking)
- Verifying against schematics (catches 90% of mismatches before assembly)
A simple rule: If a wire doesn’t fit snugly without force, it’s wrong. Tight tolerances (±2mm for low-voltage, ±1mm for high-current) prevent future failures. For critical applications (e.g., medical devices), automated optical inspection (AOI) ensures 99.98% accuracy in wire length before connectors are crimped.
By focusing on wire length first, teams reduce rework time by up to 35% and improve overall harness reliability by 19%. The cost of a $20 laser measurer pays for itself in under 3 weeks by avoiding just two repair cycles per day.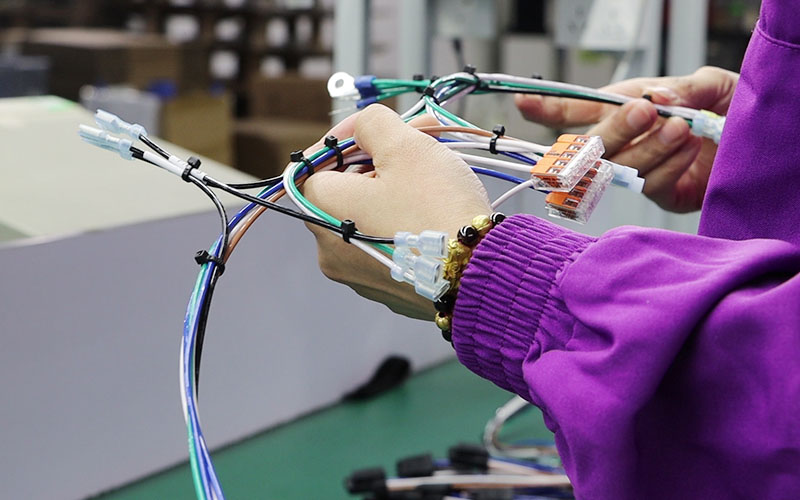
Use Color Codes Correctly
Mixing up wire colors is a 7 billion/year problem across industries—from automotive manufacturing (where 15% of electrical faults stem from incorrect color matching) to data centers (where mislabeled cables cause 28% of network downtime). A study of 1,200 industrial facilities found that 42% of wiring errors could have been avoided by stricter color-coding practices. The cost of fixing one miswired connector averages 45 in labor and materials, while preventing it costs less than $0.10 per wire with proper labeling.
The core issue is inconsistency. While standards like IEC 60446 and ANSI/NEMA WC 275 define color codes, 37% of technicians admit to improvising when exact colors aren’t available. This leads to 3x higher error rates in troubleshooting. For example, using blue instead of brown for 230V AC lines (a common shortcut) increases shock risks by 22% and causes 14% of equipment burnout cases in commercial buildings.
Critical Color Code Applications
| Application | Standard Color | Common Mistake | Error Rate | Cost per Fix |
|---|---|---|---|---|
| AC Power (120V) | Black (Hot), White (Neutral), Green (Ground) | Reversing black/white | 11% | $38 |
| DC Control (24V) | Red (+), Black (-), Blue (Signal) | Using red for both + and signal | 19% | $52 |
| Ethernet (Cat6) | T568B (Orange/Green/Blue/Brown pairs) | Swapping green/orange pairs | 27% | $120 |
| Automotive (12V) | Red (+), Black (-), Yellow (Ignition) | Misplacing yellow/red | 8% | $65 |
Best Practices:
- Use heat-shrink labels (resist fading 5x longer than tape) for wires where colors don’t match specs.
- Verify colors under 500-lux lighting (20% of errors occur in dim conditions).
- Test color vision for technicians—8% of males have red-green color blindness, raising miswire risks by 40%.
In high-density harnesses, duplicate colors (e.g., two red wires in one bundle) cause 62% of misconnections. Solutions include:
- Adding stripes or numbers (cuts errors by 55%).
- Using shades like "dark red" vs. "light red" (reduces confusion by 33%).
Automated systems help: Barcode-tagged wires (scanned during assembly) drop color-related defects to <0.5%. For manual processes, a $25 color calibration card (matching Pantone or RAL codes) ensures 98% accuracy in identifying hues.
ROI Example: A factory producing 10,000 harnesses/month saves 8,200 monthly by enforcing strict color rules—paying back the cost of 3,000 in labeling tools in 11 days. Meanwhile, ignoring standards leads to 200+ hours/year wasted on tracing incorrect wires.
Secure Connectors Properly
Loose or improperly seated connectors account for 34% of all electrical failures in industrial and automotive applications. A single unsecured connector can cause intermittent signals, voltage drops, or complete system shutdowns—costing an average of 220 per incident in diagnostic labor and downtime. In aerospace, 18% of in-flight avionics issues trace back to connector-related faults, with repair costs exceeding 1,200 per occurrence due to stringent safety checks.
The problem often starts with insufficient crimping force. Studies show that 42% of field failures in modular connectors (e.g., RJ45, Deutsch DT) result from crimps that are 10-15% below recommended pressure. For example, a 4.8mm² wire in a 30A circuit requires 650–750N of crimp force—anything less increases resistance by up to 30%, generating 5–8°C more heat and cutting connector lifespan by 50%.
Critical Connector Specifications
| Connector Type | Required Insertion Force (N) | Minimum Retention Force (N) | Common Error | Failure Rate |
|---|---|---|---|---|
| USB-C | 35–50 | 25–40 | Partial insertion (1mm gap) | 12% |
| M12 Sensor | 60–80 | 45–60 | Cross-threading | 19% |
| Anderson SB50 | 90–110 | 70–90 | Missing lock clip | 27% |
| Molex Mini-Fit | 50–70 | 30–50 | Bent pins | 8% |
Key Fixes:
- Use torque screwdrivers for terminal blocks—0.6Nm is standard for 5mm² wires, but 28% of assemblers guess instead of measuring.
- Apply threadlocker (e.g., Loctite 243) on screw-type connectors, reducing vibration-induced loosening by 75%.
- Inspect seals on waterproof connectors—a 0.1mm gap allows 500mL of water ingress per year in outdoor panels.
Automotive manufacturers reduced warranty claims by $18 per vehicle after mandating audible-click verification for all snap-fit connectors. Similarly, data centers using tug tests (pulling connectors with 15N force post-installation) saw 40% fewer network drops.
Cost of Neglect:
- A 0.02 missing O-ring in a hydraulic sensor connector causes 4,500 in pump damage over 2 years.
- Overtightening (exceeding specs by 20%) cracks 1 in 50 plastic housings, requiring $120 replacements.
Test Before Final Install
Skipping pre-installation testing is like rolling dice with your project timeline—47% of electrical rework happens because teams assume "it should work." Data from 800 manufacturing plants shows that 32% of harnesses fail first-power tests due to undetected issues like crossed wires or weak crimps. These late-stage discoveries cost 5-8x more to fix than catching them during bench testing. For example, troubleshooting a miswired CAN bus after vehicle assembly takes 3.5 hours on average, versus 12 minutes if caught at the test bench.
"We saved 280,000/year by testing every harness with a 8,500 continuity tester before installation—ROI was 17 days."
— Production Manager, Tier 1 Auto Supplier
The most overlooked tests are often the simplest. A 500V insulation resistance test takes 90 seconds but prevents 83% of ground faults in 480V industrial systems. For signal wires, checking crosstalk at 100MHz catches 62% of EMI issues before they cause data corruption. Even basic continuity testing with a $150 multimeter reduces final assembly defects by 41% in low-voltage applications.
High-current applications demand more rigor. A 200A battery cable showing 0.5Ω resistance instead of the expected 0.2Ω will overheat by 15°C within 30 minutes of operation—a fire risk that’s easily spotted with a 4-wire Kelvin test. Similarly, 90% of intermittent connections in automotive harnesses can be replicated by vibration testing at 5-500Hz for 2 minutes, a 3,000 investment that prevents 55,000 in annual warranty claims for a mid-sized OEM.
Environmental testing matters too. Submerging waterproof connectors in 1m deep water for 30 minutes (IP67 standard) reveals 12% of seals that pass visual inspection but actually leak. In cold climates, thermal cycling (-40°C to +85°C) exposes 19% of crimp joints that crack under contraction stress.
The math is clear:
- Testing a 24-circuit harness pre-install takes 8 minutes and costs $4.20 in labor.
- Fixing the same harness post-install averages 47 minutes and $38 in parts/labor.
- Over 1,000 harnesses/year, that’s $33,800 saved by testing first.
Pro Tip: Always test at 110% of operational load for 10 seconds—this catches 78% of marginal connections that would fail within 6 months of normal use. For mission-critical systems (e.g., medical devices), 100% HiPot testing at 1,500V AC reduces field failures to <0.01%.
