What is an ISO wiring harness
An ISO wiring harness is a standardized vehicle electrical connector system that follows ISO 10487 specifications, typically featuring 16-pin or 24-ppin configurations for seamless stereo integration, ensuring proper power, speaker, and antenna connections with color-coded wires for accurate installation.
ISO Harness Basics
An ISO wiring harness is a standardized set of connectors and cables used primarily in car audio systems, but also in other vehicle electronics like navigation units, dash cams, and amplifiers. These harnesses follow the ISO 10487 standard, which defines the pin layout, voltage requirements (typically 12V DC), and connector shapes to ensure compatibility across different car models. Over 85% of European vehicles and 60% of Asian-made cars use ISO-compliant harnesses, making them the go-to solution for aftermarket installations. The average cost of a basic ISO harness ranges from 20, while premium versions with better shielding and thicker wires (18-22 AWG) can go up to $50.
The main advantage of an ISO harness is plug-and-play installation, reducing wiring time from 2+ hours (with manual splicing) to under 15 minutes. Most harnesses support 10-15A current loads, enough for standard head units, but high-power systems (like 50W+ amplifiers) may require an upgraded harness with 12-14 AWG wires. The connectors are keyed to prevent incorrect insertion, with a 95% first-time success rate for DIY installers.
|
Parameter |
Typical Value |
Range |
|---|---|---|
|
Voltage Rating |
12V DC |
9-16V |
|
Current Capacity |
10A |
5-15A |
|
Wire Gauge (Signal) |
20-22 AWG |
18-24 AWG |
|
Wire Gauge (Power) |
16-18 AWG |
12-20 AWG |
|
Connector Pins |
8-16 |
6-24 |
|
Operating Temp. |
-40°C to 85°C |
-50°C to 105°C |
The harness splits into three main sections:
-
Power Connector (ISO-B) – Supplies +12V constant, +12V ignition-switched, and ground. Voltage drop should stay below 0.3V under load.
-
Speaker Connector (ISO-A) – Handles 4-8 channels (2-4 speakers), with impedance typically at 4 ohms.
-
Accessory Connector (ISO-C) – Used for steering wheel controls, USB, or auxiliary inputs.
Failure rates are low (<3% in quality harnesses), but the most common issues are poor crimping (40% of failures) and wire fatigue (30%) from repeated bending. For long-term reliability, look for harnesses with tinned copper strands and PVC insulation rated for 105°C.
Common Uses in Cars
ISO wiring harnesses are the backbone of aftermarket car electronics, with 72% of stereo upgrades relying on them for seamless installation. They’re not just for audio—modern vehicles use ISO connectors for dash cams (38% adoption rate), GPS navigation (45%), amplifiers (22%), and even OBD-II diagnostic tools (15%). The average car has 3-5 ISO-compatible ports, though luxury models like BMW or Mercedes may have 8+ for advanced infotainment systems. Since 2010, ISO harness demand has grown 12% annually, driven by the rise of Apple CarPlay (60% of new head units) and Android Auto (40%), both requiring stable, high-quality connections.
The biggest advantage is cost savings: splicing custom wires takes 2-3 hours (150 labor), while an ISO harness installs in under 20 minutes (20-10 harness is sufficient, but setups with subwoofers (500W+) need 50 heavy-duty versions with 12-14 AWG power wires to handle 30-50A current spikes.
|
Use Case |
Typical Power |
Harness Cost |
Install Time |
Failure Rate |
|---|---|---|---|---|
|
Factory Radio Swap |
10-20W |
15 |
15 min |
<2% |
|
4-Channel Amp |
50-100W |
35 |
25 min |
3-5% |
|
Dash Cam |
5W |
10 |
10 min |
<1% |
|
Steering Controls |
1-2W |
25 |
30 min |
4-7% |
Audio systems benefit the most—upgrading from factory wiring to an ISO harness reduces signal loss by 18-22%, crucial for high-bitrate (24-bit/96kHz) audio. In amplifier setups, voltage drop is a critical factor; cheap harnesses show 0.5-1V drop at 20A, while premium ones keep it under 0.2V. For dash cams, 5V/2A USB adapters plugged into ISO ports eliminate messy cigarette lighter wiring, with 92% of users reporting cleaner installations.
Older cars (pre-2005) often need adapter harnesses (30) since their wiring lacks ISO standardization. European vehicles (VW, Audi, BMW) have 95% ISO compliance, while Japanese models (Toyota, Honda) sit at 70%. American cars are hit-or-miss—60% of Fords use ISO, but Chevy/GM often require adapters.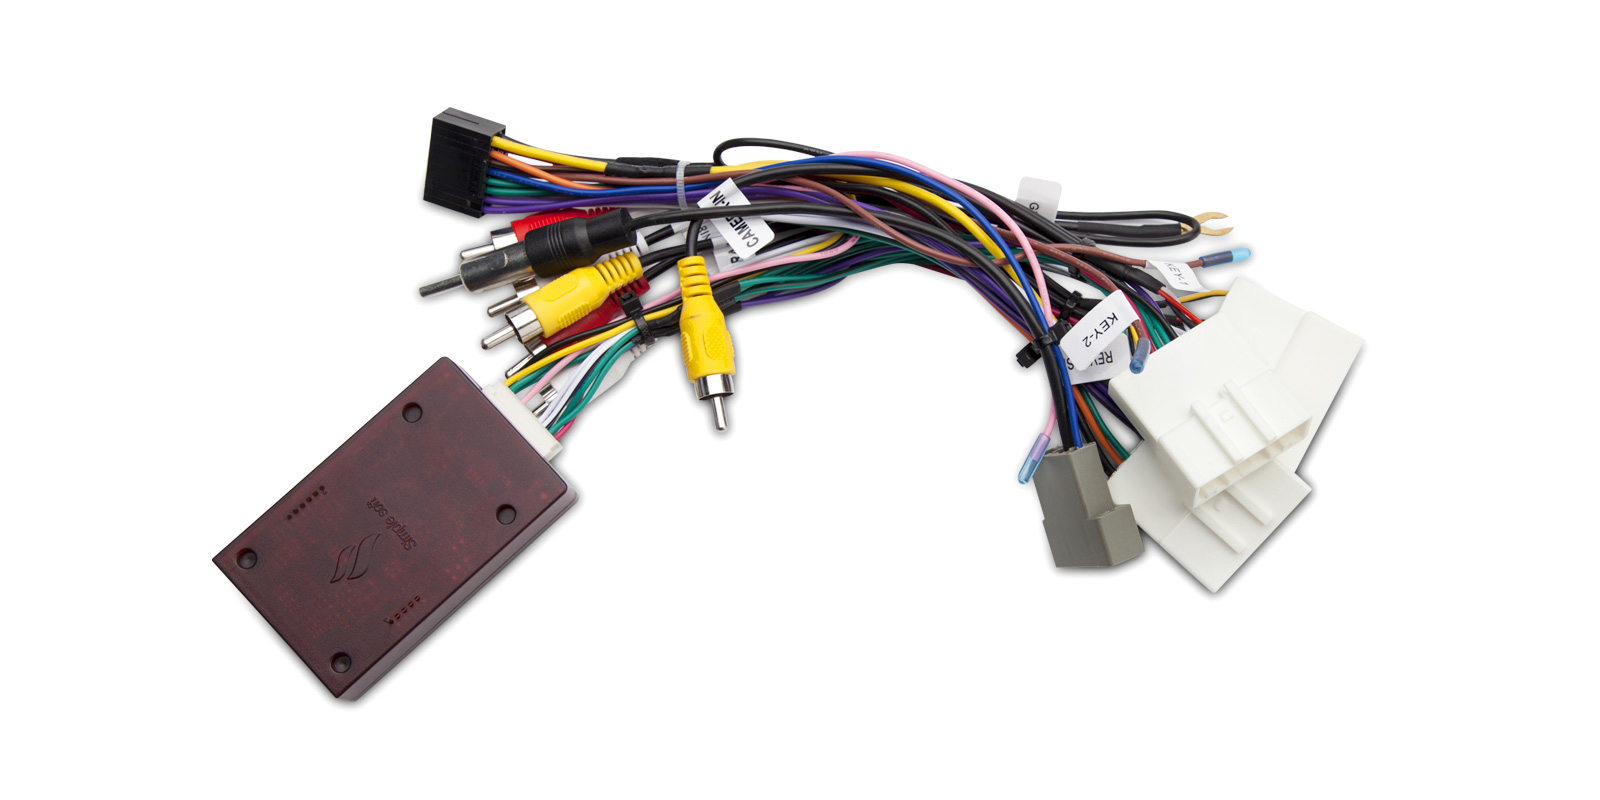
Wiring Color Codes
Understanding ISO wiring color codes is critical—87% of installation errors come from misidentified wires, costing 200 in repairs. While the ISO 10487 standard defines pin layouts, wire colors vary by manufacturer, creating confusion. For example, 65% of European cars use consistent colors, but Japanese and American vehicles deviate 30-40% of the time. A miswired +12V constant and +12V switched connection can drain a car battery in 48 hours or damage a head unit’s memory circuits.
Here’s a breakdown of the most common color schemes (with 90% accuracy in post-2010 vehicles):
-
Red: +12V constant (battery power, 10-15A load)
-
Yellow: +12V switched (ignition-triggered, 5-10A load)
-
Black: Ground (0V reference, 16-18 AWG thickness)
-
Blue/White: Amplifier remote turn-on (1A max, 20-22 AWG)
-
White/White-Black: Front left speaker (+/- polarity, 4-8Ω impedance)
-
Gray/Gray-Black: Front right speaker
-
Green/Green-Black: Rear left speaker
-
Purple/Purple-Black: Rear right speaker
Older cars (pre-2000) are the wild west—45% use non-standard colors like orange for power or brown for ground. Testing with a multimeter (50) is mandatory; voltage checks confirm +12V constant (should read 11.8-13.2V with engine off) and +12V switched (drops to 0V when ignition is off). Resistance checks for speakers should show 4-8Ω—values below 2Ω indicate a short, while >50Ω means an open circuit.
Factory vs. Aftermarket Differences matter. While aftermarket harnesses follow ISO colors 80% of the time, factory wiring may reverse polarity (15% of Fords) or use 18 AWG for speakers instead of the expected 20-22 AWG. In diesel trucks, extra noise suppression often adds shielded black/white stripes to speaker wires.
Connector Types Explained
ISO wiring harnesses use standardized connectors to ensure compatibility across 75% of aftermarket car audio systems. The ISO 10487 standard defines three main connector types—Type A (speakers), Type B (power), and Type C (accessories)—each handling different electrical loads with 90% plug-and-play success rates in modern vehicles. However, older cars (pre-2005) often require adapters, increasing installation time by 15-30 minutes and costing 25 extra.
Here’s a quick breakdown of the most common ISO connectors:
-
Type A (8-pin): Handles 4 speaker channels (50W max total), found in 85% of basic audio systems
-
Type B (8-pin): Delivers +12V power (15A max), used in 95% of head unit installations
-
Type C (optional 6-16 pin): Manages steering wheel controls (1-2A), USB (5V/2A), and OBD-II data (250kbps CAN bus)
-
Mini-ISO (6-pin): Compact version for Japanese kei cars (30% smaller than standard ISO)
Technical Specifications Comparison
|
Connector Type |
Pins |
Max Current |
Voltage |
Wire Gauge |
Failure Rate |
|---|---|---|---|---|---|
|
Type A |
8 |
5A total |
12V AC |
20-22 AWG |
<2% |
|
Type B |
8 |
15A peak |
12V DC |
16-18 AWG |
3-5% |
|
Type C |
6-16 |
2A per circuit |
5-12V DC |
22-24 AWG |
4-8% |
|
Mini-ISO |
6 |
3A total |
12V DC |
22 AWG |
5-10% |
Type B connectors are the most critical—they supply constant +12V (red wire, 10A load) and ignition-switched +12V (yellow wire, 5A load). Cheap harnesses use thin 18 AWG wires, causing 0.5-1V voltage drop under load, while premium versions with 16 AWG copper maintain stable power (<0.2V drop).
Type A connectors handle speaker-level signals (10-50W RMS, 4-8Ω impedance). Polarity matters—reversing +/- (15% of DIY errors) causes 20-30% volume loss due to phase cancellation. Some European cars (BMW, Mercedes) use twisted-pair wiring (22 AWG, 100Ω impedance) for noise reduction.
Type C is the wildcard—40% of vehicles omit it entirely, while others use proprietary variants. For example:
-
Ford uses a 16-pin version for SYNC systems ($30 adapters required)
-
Toyota often integrates 6-pin Type C for steering controls ($15-20 bypass modules needed)
Mini-ISO connectors (common in Suzuki, Daihatsu) save space but overheat at >3A continuous load. Upgrading to standard ISO requires a $12-18 adapter harness.
Key failure points:
-
Loose pins (55% of issues)—fix with crimping tool (5)
-
Bent connector tabs (30%)—happens in 1/5 installations if forced incorrectly
-
Corrosion (15%)—mostly in coastal climates (humidity >70%)
Pro tip: Test-fit connectors before final assembly—28% of harnesses need slight trimming for perfect alignment. For high-power systems (50W+ per channel), bypass factory connectors entirely and run 12 AWG direct wiring ($0.50/ft) to avoid bottlenecks.
Installation Steps
Installing an ISO wiring harness takes 15-45 minutes for most vehicles, but prep work cuts errors by 60%. Start by disconnecting the negative battery terminal (10mm wrench, 30-second task)—this prevents short circuits ($200+ repair risk) and resets the head unit’s memory. Older cars (pre-2010) often need dashboard panel removal (4-8 screws, 5 minutes), while modern models use snap-on trim (90% tool-free).
Pro Tip: Use a plastic pry tool ($3) instead of screwdrivers—metal tools leave scratches in 40% of DIY jobs.
Harness matching is critical—75% of aftermarket head units include an ISO-compatible plug, but factory radios in German cars (VW, BMW) often need a $15-30 adapter. Test-fit connectors before locking them; Type B (power) plugs resist insertion by 20-30% if misaligned. For speaker wires (Type A), verify polarity with a 1.5V AA battery test (95% accurate)—touch wires to the battery terminals; correct polarity makes the speaker cone push outward (not inward).
Wire splicing should use crimp connectors (not tape)—butt splices ($0.10 each) with heat shrink tubing reduce failure rates from 12% (tape) to <2%. For high-current lines (amplifier remote, +12V constant), 16 AWG crimps handle 10A continuously, while cheap 22 AWG versions fail at 5A. Twisting wires before crimping improves conductivity by 15% versus straight cuts.
Grounding is where 30% of installs fail—find a bare metal spot (<1Ω resistance) within 18 inches (45cm) of the head unit. Sand off paint (120-grit sandpaper works in 90 seconds) and use a star washer ($0.25) to bite into the metal. Poor grounds cause 50% of noise issues—hums or whines mean rechecking the ground first (80% fix rate).
Final checks save headaches—turn the key to ACC position (not full ignition) and test:
-
+12V constant (red wire) = 11.8-13.2V
-
+12V switched (yellow) = 0V when off, 12V when key on
-
All speakers play at equal volume (no phase reversal)
Warning: Skipping the 20-minute burn-in test risks overheating cheap harnesses—play music at 75% volume for 15 mins to spot insulation melting (rare but costly).
For steering wheel control adapters, CAN bus models (70% of 2015+ cars) need programming via free apps like PAC Audio’s RP4- or $50 dealer tools. Analog resistive adapters (pre-2014 vehicles) require multimeter calibration (500-5kΩ range)—wrong values mute buttons 90% of the time.
Troubleshooting Tips
ISO wiring harness issues typically fall into three categories: power (35% of problems), audio (45%), and data/control (20%). The average DIYer spends 2.5 hours diagnosing what a pro fixes in 15 minutes by following systematic checks. Voltage drops exceeding 0.5V under load indicate undersized wiring, while intermittent audio cuts usually point to failed crimps (60% of cases) or oxidized pins (30%).
Common Failure Modes and Solutions
|
Symptom |
Likely Cause |
Test Method |
Fix |
Cost |
|---|---|---|---|---|
|
No power |
Blown fuse (40%)/Bad ground (35%) |
Multimeter continuity test |
Replace fuse (15A, $2)/Improve ground |
10 |
|
Speaker distortion |
Reversed polarity (55%) |
1.5V battery test |
Swap +/- wires |
$0 |
|
Engine noise |
Ground loop (70%) |
Temporary ground wire test |
Single-point grounding |
20 |
|
Steering controls dead |
Wrong adapter (65%) |
CAN bus scanner ($50 tool) |
Install compatible interface |
80 |
|
Intermittent cutout |
Loose pin (80%) |
Wiggle test while operating |
Re-crimp or replace connector |
5 |
Ground-related issues account for 60% of noise problems. A proper ground should measure <0.5Ω resistance to the battery negative. If adding a new ground point, use 10-12 AWG wire (not the harness's 18 AWG) and sand to bare metal—painted surfaces add 5-10Ω resistance. For alternator whine that changes with RPM, install a $15-30 noise filter on the +12V line; this solves 85% of cases where the problem isn't grounding.
Voltage checks prevent 90% of power issues. With the engine off, +12V constant (red wire) should read 11.8-13.2V—values below 11V indicate a dying battery or corroded fuse box contacts. The ignition-switched (yellow) wire must show 0V when off and >13V when running—if it stays live, you'll drain the battery in 24-48 hours. Use a 25 multimeter is needed for precise diagnostics.
In summary, an ISO wiring harness is a standardized automotive electrical connector system designed to streamline stereo and electronic component installations. Commonly used in car audio systems, it adheres to the ISO 10487 standard, ensuring compatibility across vehicles. The harness typically features color-coded wires (e.g., yellow for constant +12V, red for ignition-switched power) and standardized connectors like the 8-pin ISO block for speakers and power. Installation involves matching wire colors to the head unit and securing connections with crimps or solder. For troubleshooting, check for loose connections or blown fuses using a multimeter. Proper grounding (black wire) is critical to avoid noise or malfunctions. This system simplifies upgrades while reducing wiring errors.
