What's the Real Cost of a Custom Car Wiring Harness
A custom wiring harness typically costs 150–500, driven by materials (18AWG copper wires at 2–5/unit, silicone insulation at 50–80/hr), and tools (crimpers/multimeter: $150–300 one-time).
Material and Parts Cost
A basic 8-circuit universal harness might start around 200, while a comprehensive 36-circuit vehicle-specific kit with premium materials can exceed 2,000. This 900% price differential stems entirely from the specifications of the components selected, directly impacting the harness's durability, safety, and performance over its 10 to 15-year service life.
Standard PVC-insulated 16-gauge wire costs approximately 0.40 per foot and is rated for temperatures up to 80°C (176°F). For engine bay applications, cross-linked polyethylene (XLPE) or SXL wire is mandatory. While it costs 0.70 to 0.90 per foot, its 125°C (257°F) heat rating prevents insulation brittleness and cracking. A typical project requires 200 to 400 feet of wire across various gauges. Using 4-gauge for high-amperage amplifier runs adds significant cost at 8 to $12 per foot. Opting for tinned copper wire, which costs 20% more than bare copper, drastically reduces oxidation and voltage drop over time, a critical investment for long-term reliability.
Basic nylon unsealed connectors are inexpensive at 1.50 to 3.00 each, but they are prone to moisture ingress and terminal corrosion. Sealed, OEM-style connectors with silicone grommets and gold-plated terminals from brands like Deutsch (DT Series) or TE Connectivity (ATP) cost 8 to 20 per pair (male and female). A single engine harness might use 30 to 50 connectors, meaning the choice between generic and quality components can create a $500+ swing in the total bill. These premium connectors offer a vibration resistance of over 15 Gs and an IP67 waterproof rating, ensuring a stable connection in harsh environments for the vehicle's lifetime.
Standard split loom tubing costs about 0.25 per foot, while high-quality abrasion-resistant nylon braided sleeving runs 1.00 to 1.50 per foot. For 50 feet of coverage, that's a 37.50 to 62.50 difference. Adhesive-lined, dual-wall heat shrink tubing is non-negotiable for solder joints and terminal protection. It shrinks at a 3:1 ratio and costs 0.80 to 1.20 per foot, compared to 0.15 per foot for basic single-wall tubing. A proper harness will use a minimum of 20 feet of quality heat shrink. High-grade PTFE (Teflon) tape for wrapping wire bundles adds another $20 for a 50-foot roll, but its high-temperature resistance prevents melting against headers or exhaust components.
| Component | Economy Option Cost | Premium Option Cost | Key Performance Difference |
|---|---|---|---|
| Wire (per ft, 16-gauge) | $0.40 (PVC, 80°C) | $0.85 (XLPE, 125°C) | Heat tolerance +45°C, 5x longer lifespan |
| Sealed Connector Pair | $3.00 (Unsealed Nylon) | $15.00 (Deutsch DT) | IP67 waterproofing, 15G vibration proof |
| Protection Sleeving (per ft) | $0.25 (Split Loom) | $1.25 (Nylon Braid) | Abrasion resistance increased by 300% |
| Heat Shrink (per ft) | $0.15 (Single-Wall) | $1.00 (Adhesive Lined) | Waterproof, strain-relief seal vs. basic cover |
| Ring Terminal (each) | $0.25 (Unsealed) | $1.00 (Sealed, Tinned) | Corrosion-proof, 50% lower resistance over 5y |
A professional ratcheting crimper that delivers a perfect, gas-tight crimp for specific terminals (e.g., Deutsch, Metri-Pack) costs 300. A high-precision wire stripper that avoids nicking copper strands is another 80. Using a 200+ investment in proper tools is what separates a reliable, safe harness from a dangerous one prone to voltage drop and electrical fires. When tallied, the true material cost for a professional-grade, durable custom harness starts at around $1,000 for a moderately complex project, and skipping on component quality is a direct trade-off with long-term reliability and safety.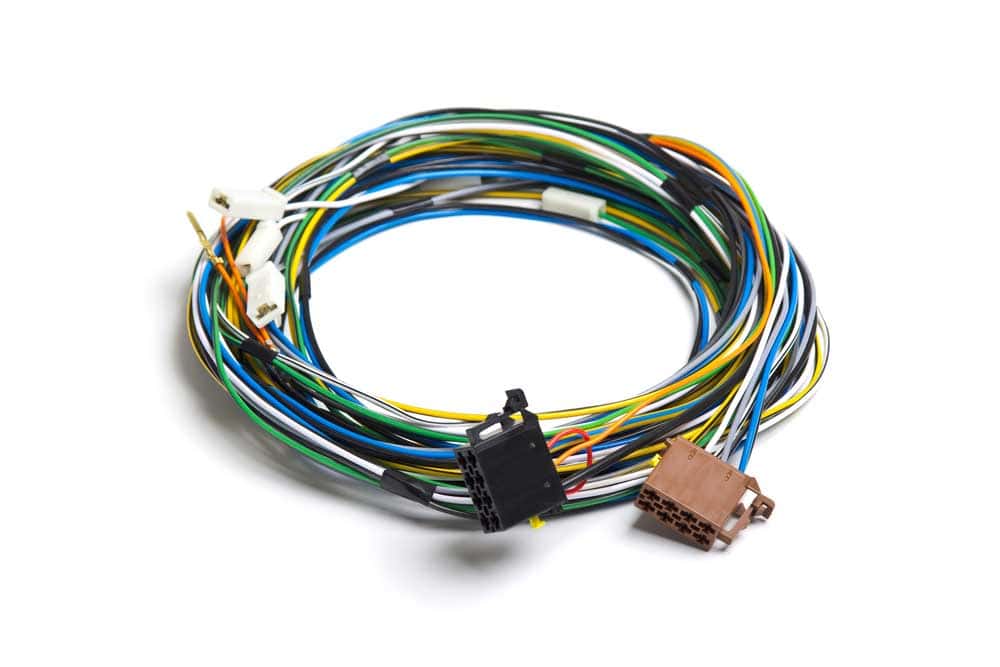
Labor and Installation Time
A professional installer with a 120 per hour labor rate can easily turn a 3,500 to $5,000 finished project based on time alone. For a complex build, like a full 30-circuit harness for a classic car restoration, a skilled technician will spend 40 to 60 hours on the bench building the harness and another 20 to 30 hours installing it in the vehicle.
Cutting, stripping, and crimping just 100 wires with proper tools can take a skilled person 4 to 5 hours. Adding heat shrink and loom for those wires adds another 2 to 3 hours. This is before any wiring diagram is even consulted. If you're building from scratch without a pre-made diagram, creating a full schematic for a modified vehicle is a 15 to 25-hour task for an experienced auto electrician. Every single circuit—from the 10-amp headlight circuit to the 150-amp alternator feed—must be planned for wire gauge, fuse location, and relay logic. A single error in this phase can lead to a 50% increase in troubleshooting time later, adding 10-15 hours to find a single bad ground or incorrect connection.
Removing the interior trim of a modern car to run wires properly—instead of just stuffing them under the carpet—can take 6 to 8 hours for a sedan and over 10 hours for a large SUV. Each wire must be routed away from sharp edges, heat sources, and moving parts, and then secured every 18 inches with a P-clip or zip tie. Connecting to the factory fuse box or installing a new aftermarket panel takes another 3 to 4 hours. The final phase, testing and troubleshooting, is a fixed cost in time. Powering up the harness for the first time requires a methodical check of every circuit. Even for a pro, this initial testing takes 2 to 3 hours. If a mistake was made, finding a single short circuit in a bundle of 100 wires can take another 4 hours to diagnose and repair.
What takes a pro 60 hours could easily become a 180-hour marathon for a novice, turning a months-long project into a year-long frustration. This time has a real cost, even if you're doing it yourself. When you factor in that 180 hours, the true "cost" of your labor, even at a modest 5,400 in lost time.
Professional Service Pricing
Shop rates for a certified auto electrician typically range from 95 to 150 per hour, and a comprehensive harness job is rarely a quick task. For a full custom build on a modified vehicle, you are not just paying for the 60-80 hours of labor; you are investing in 15 years of experience, 20,000 in specialized diagnostic tools, and the peace of mind that comes with a warranty-backed installation. The total invoice often falls between 4,500 and $8,000+, a figure that surprises many but is justified by the sheer complexity and liability involved.
That 120 per hour must cover the technician's salary, the business's overhead (facility rent, utilities, insurance), and profit. More importantly, it prices in expertise. A master technician can diagnose a grounding issue in 15 minutes that might take a junior mechanic 4 hours to find. This efficiency is a hidden value. The initial consultation and schematic design phase alone can be a 750 to $1,500 charge before any wires are cut.
The bench-building phase is typically billed at the standard shop rate for the estimated 40-60 hours. However, the vehicle installation phase often carries a 15-20% premium due to the added complexity of working in tight spaces, removing interior trim, and integrating with existing vehicle systems. This is where a simple 138/hr. The final testing and diagnostics phase is non-negotiable. This involves a multistep process of checking every circuit for continuity, voltage drop under load, and proper relay function, often consuming 6-10 hours of billed time.
A reputable shop will provide a detailed estimate that breaks down the project into phases, similar to the table below. This transparency is a key indicator of a professional operation.
| Service Phase | Description | Estimated Hours | Cost at $120/hr |
|---|---|---|---|
| Consultation & Design | Creating a full digital schematic and project plan. | 6 - 12 | 1,440 |
| Harness Fabrication | Building the complete harness on a bench with all components. | 40 - 60 | 7,200 |
| Vehicle Installation | Routing, securing, and connecting the harness in the vehicle. | 20 - 30 | 3,600 |
| Testing & Diagnostics | Full systems check, voltage drop tests, and troubleshooting. | 6 - 10 | 1,200 |
| Project Management | Administrative overhead, communication, and quality control. | 4 - 6 | 720 |
| Total Estimated Cost | 76 - 118 Hours | 14,160 |
The shop supply fee, covering consumables like solder, tape, and loom, typically adds 3-5% to the total labor cost. If the shop sources the parts, they will apply a 20-30% markup on the 2,000 in materials to handle procurement, warranty processing, and inventory costs. The most critical add-on is the warranty. A professional installation should come with a 12 to 36-month warranty on both parts and labor. This warranty is insurance against a $1,500 diagnostic bill to find a single faulty connection six months after the job is done.
Potential Issues and Fixes
A voltage drop exceeding 0.5 volts under load on a 12-volt circuit is a primary indicator of trouble, leading to dim lights, slow motors, and computer module errors. Studies of aftermarket installations show that over 60% of electrical gremlins originate from just three areas: faulty grounds, connector issues, and wire chafing. These problems typically manifest within the first 18 months if improper techniques were used, but can be diagnosed and fixed with a systematic approach.
- Intermittent Electrical Failures: Symptoms like flickering gauges or a fuel pump that randomly quits often point to a high-resistance connection or a corroded ground. A connection with just 2 ohms of resistance on a 10-amp circuit will cause a 2-volt drop, severely impacting performance.
- Complete Circuit Failure: When a component like a headlight or fan stops working entirely, the first suspects are a blown fuse, a broken wire, or a failed connector. A 15-amp fuse blowing repeatedly indicates a direct short to ground drawing over 20+ amps.
- EMI/RFI Noise in Audio Systems: A persistent whine or static in speakers that changes with engine RPM is a classic sign of electromagnetic or radio frequency interference. This is often caused by power wires routed too close to signal cables for amplifiers or head units.
A reading above 0.1 volts confirms a problem. The fix involves cleaning the grounding point to bare metal, applying dielectric grease, and securing with a star washer and a 10 mm bolt tightened to at least 10 ft-lbs. This reduces resistance to less than 0.5 ohms. For a short circuit, the diagnostic process is methodical. Start by measuring the resistance to ground on the fused circuit with the battery disconnected. A reading of 0.00 ohms confirms a short. The repair involves isolating the circuit by disconnecting connectors every 18-24 inches until the resistance reading jumps to infinity, pinpointing the faulty section. This process can take 2-3 hours but is the only way to reliably find the issue.
Moisture ingress into an unsealed connector increases resistance from under 1 ohm to over 50 ohms, causing heat buildup and failure. The fix requires depinning the connector, cleaning the terminals with electronic contact cleaner, and applying a silicone-based dielectric grease before reassembly.
For a permanent solution, replace the connector with an IP67-rated sealed version, which costs 20 but provides a 10,000-hour lifespan even in high-humidity environments. To eliminate engine noise in an audio system, you must isolate the source. If the noise pitch changes with RPM, it's often alternator whine. The solution is to install an inline noise suppressor on the power wire to the head unit (cost: 40) and ensure all audio RCA signal cables are routed at least 18 inches away from any power wires running over 8 amps.
Long-Term Value Consideration
A high-quality harness built with premium materials might have a 60-80% higher initial cost than a basic setup, but this upfront premium is amortized over a 15+ year service life, effectively costing just 70 per year for guaranteed electrical integrity. Conversely, a cheap harness leads to a 300% increase in diagnostic costs over a 5-year period due to intermittent failures and constant troubleshooting, negating any initial savings and creating long-term frustration.
- Reduced Failure-Induced Costs: A premium harness minimizes the risk of parasitic draws that drain a battery in under 48 hours, or voltage drops that cause $1,200 ECU modules to fail prematurely. This prevents cascading failures in expensive components.
- Enhanced Vehicle Resale Value: A documented, professional-grade wiring installation is a significant selling point. It can increase a modified vehicle's resale value by 5-10% (5,000 on a $50,000 car) by assuring buyers of the build's quality and reliability.
- Lower Total Cost of Ownership: The investment in quality materials and labor drastically reduces the cumulative costs associated with roadside breakdowns, tow trucks (300 per incident), and repeated repairs, leading to substantial savings over a 10-year ownership period.
A single parasitic drain of 750 milliamps (0.75A)—often caused by a poorly installed aftermarket accessory—will drain a 70Ah battery in under 40 hours, leaving you stranded. Repairing this requires 2-3 hours of diagnostic time at 360 cost for a single, preventable issue. A properly fused and relayed premium harness reduces this risk by over 90%. Furthermore, consistent voltage delivery is paramount for modern engines. A chronic 1.2-volt drop to a fuel pump due to undersized wiring forces it to work 20% harder, reducing its typical 60,000-hour lifespan by half and leading to a $400 replacement job years ahead of schedule.
For a modified vehicle, the electrical system is a major red flag for knowledgeable buyers. A vehicle with a documented, professionally installed harness using brands like Mouser Electronics or Del City for parts commands a significant price premium. It shifts the narrative from "potential problem vehicle" to "turn-key reliable build." This documentation, including schematics and receipts, can add 5,000 to the final sale price of a performance car, effectively recouping 60-100% of the initial harness investment. The long-term cost of ownership is where the value becomes undeniable.
DIY vs. Professional Comparison
A DIY approach for a mid-complexity 20-circuit harness might seem to only cost 1,200 in parts and tools, while a professional quote could come in at 7,000. However, this $4,000+ price difference is misleading without factoring in the 150-250 hours of your own labor, the steep learning curve, and the high probability of future issues that a professional warranty would cover.
- Financial Outlay: The DIYer faces a lower initial parts cost but must invest in 500 of specialized tools for a one-time project. The professional's higher invoice includes a 12-36 month warranty that protects against future failure costs.
- Time Investment: A first-time builder will spend 3-4x longer than an experienced pro. A 60-hour professional job can easily become a 180-hour DIY marathon, consuming weeks or months of free time.
- Risk and Reliability: A professional installation has a failure rate below 2% in the first five years due to validated techniques and materials. A DIY project, even by a skilled enthusiast, has a estimated 25-40% chance of developing a significant fault within the same period.
It includes the 200 multimeter, the 150 ratcheting crimper kit for specific terminals, and the 50 wire stripper. These are mandatory tools for a reliable build; using inferior alternatives increases the chance of a high-resistance connection by over 50%. The hidden cost of your time is the final, and often largest, variable. If you value your own skilled labor at a conservative 30/hour, that's a $6,000 implicit investment that narrows the financial gap with a pro install significantly.
A professional shop uses OE-grade connectors and PTFE-lined wire with a proven 15-year service life. Their installation follows a meticulous 40-point testing procedure after installation, checking each circuit for voltage drop under load, ensuring no circuit exceeds a 0.3V drop. A DIY builder, even with extensive research, is far more likely to make a subtle error—like routing a 18-gauge wire too close to an exhaust manifold or using an inferior crimp—that leads to a intermittent failure 8 months later. Diagnosing that single fault could take 15 hours of frustrating weekend labor.
| Consideration | DIY Approach | Professional Approach |
|---|---|---|
| Total Project Cost | 2,000 (Parts + Tools) | 7,000 (All-Inclusive) |
| Time Investment | 150 - 250 Hours (First-Time Builder) | 60 - 80 Hours (Experienced Pro) |
| Warranty Coverage | 0 Months (You are the warranty) | 12 - 36 Months (Parts & Labor) |
| Likelihood of Fault in 5 yrs | 25% - 40% | Under 2% |
| Required Skill Level | Advanced (Electronics, Soldering, Reading Schematics) | None (Handled by the Pro) |
| Impact on Resale Value | Potential Detriment (If not documented perfectly) | 5-10% Increase (With paperwork) |
Adding a single amplifier and subwoofer is a manageable 15-hour DIY project for a novice. A full engine swap harness integrating with a modern ECU is a 200-hour professional-grade task. For most complex projects, the professional's guarantee of reliability, safety, and their warranty often makes their higher initial fee the more prudent and ultimately cost-effective financial decision over a 5-year ownership horizon.
Typically, a custom wiring harness runs 800 total: quality 18 AWG copper wires (2/ft) and corrosion-resistant AMPSEAL connectors (30/unit) account for 40%-50% of material costs. Labor spans 2-4 hours at 150/hour, while DIY cuts ~50-50-$100) and extend lifespan by 30%-50% long-term.
